Arugula Pesto

pasta-with-arugula-pesto

If my 10-year-old self could see me now, I wonder what she’d say.

I was a picky eater with a pretty developed flavor palate. My parents are foodies, but at 10, I was anything but. My parents had a rule that we had to try everything. We couldn’t just stick out our tongue. I remember several evenings around the family dinner table where it was a total battle of wills to just take a bite of the mahi mahi or two bites of the curry. Who knew?

At age 10, all I wanted was a crunchy iceberg salad at dinner. Instead, I had a plate of mesclun and arugula greens. I remember the requests to “finish the arugula on the plate and then….” I didn’t believe in arugula at age 10. Why does this strange lettuce have to have so much flavor?! Arugula, really?? Who knew that I would grow up to be this person that seeks out arugula. Heck, I even grow arugula on my fire escape! That’s how much I love it!

In the off season, I tend to buy the bags of baby arugula from Trader Joe’s. Arugula is in season now – as are a variety of other greens. And I’m in salad green heaven.

Arugula is a fantastic green characterized by its amazing slightly peppery flavor. It’s also sometimes called roquette or rocket greens.

fresh-arugula

Last week, as I came upon the farmer’s market outside my office, I spotted some beautiful greens and I had to have them. I eagerly bought two bunches. Of course, when I came home and picked up my CSA, there were a couple more bunches. This whole lot of arugula was in addition to a bag of baby arugula sitting in my fridge. Um. I think I had more arugula that I needed. I mean, I love salads, but this much arugula was making me twitchy.

I decided to make a pesto out of the greens. My husband usually turns down a basil pesto, but I had a hunch that the lighter flavor of the arugula leaves would be more to his liking. And I was right!

I washed and dried a few cups of the greens and pulsed it in my Cuisinart along with some garlic, lemon juice, pine nuts, salt, pepper and olive oil. It took all of two minutes.

Arugula-cuisinart

I added the pesto to some pappardelle that I tossed with some sautéed shallots, garlic, mushrooms, chickpeas and additional lemon juice. I sprinkled on some red pepper flakes and ground black pepper and dinner was served. Dinner was a success. I stored the rest of the pesto in my freezer. I am totally making this again. If only arugula season was year-round.

Hope you enjoy this as much as I did!

Arugula Pesto
 
Author:
Ingredients
  • 3.5 cups of arugula leaves (you can include some of the stems), washed
  • 3 cloves garlic
  • ½ cup toasted pine nuts
  • juice of 1 lemon
  • 2 tsp. salt
  • 2 tsp. fresh ground pepper
  • ¾ cup olive oil
  • additional salt and pepper to taste
Instructions
  1. Place everything except for the olive oil in to the bowl of a food processor.
  2. Process everything then slowly pour in the olive oil until everything is processed and mixed together.
  3. Taste the pesto and add additional salt and pepper as needed.
  4. Enjoy! Add this pesto pasta or use as a pizza topping. The options are endless.

Arugula-Pesto-Long-as-Smart-Object-1


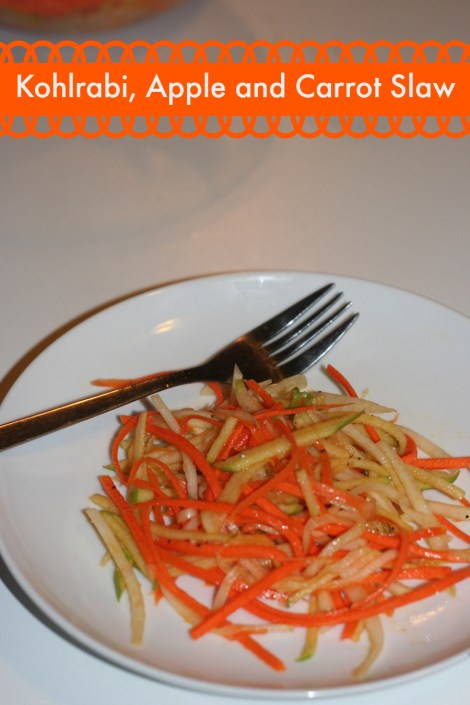
Kohlrabi, Apple and Carrot Slaw

Slawfront

I love this time of year. As the season changes, so does my palate. I look forward to every Tuesday as I go to pick up my CSA box. We’re still getting some sweet corn and tons of tomatoes, the apples are starting to come in and the greens are coming back. This past week, we had some fabulous kohlrabi and granny smith apples in the box.

I love the crunch of kohlrabi and it goes so well with apple. I decided to make a slaw out of it. We were having veggie burgers for dinner and I knew this simple slaw would top them well.

I julienned some carrots, apple, and kohlrabi. I also cut some of it into matchsticks. I then tossed everything with some fresh lemon juice, olive oil, salt and pepper. I let it sit for a bit at room temperature before eating. Delicious! Perfectly crisp and great as a side dish or as a sandwich topper,

I think I’m going to serve some of the leftovers with sloppy joes this week!

Simple salad success!


Kohlrabi, Apple and Carrot Slaw
 
Author:
Ingredients
  • 1 kohlrabi, peeled
  • 1 large carrot, peeled
  • ¾ Granny Smith apple, peeled
  • 1 tbsp. olive oil
  • Juice of 1 small lemon
  • 2 tsp. salt
  • 2 tsp. fresh ground black pepper
Instructions
  1. Using a julienne peeler, cut up the veggies into matchsticks. You can also use a knife to cut the veggies up.
  2. Mix together in a bowl with the lemon juice and olive oil. Add the salt and pepper to taste.
  3. Serve and enjoy!

Slawtext

Baked Rutabaga French Fries

rutabaga-fries-on-plate

Sometimes, easy can be a good thing. A much needed thing.

Today is our second snow day of the week. We have more snow days coming. My kids are thrilled. Me? Not so much. This winter thing is getting old.

Lately, my kitchen and meal plans have geared more towards easy and kid-focused than anything else. At this point, I’d be happy to throw macaroni & cheese from a box at them for every meal, since I know they will eat it. And I know that I will only have to clean one pot. I can’t do that though. I just don’t have it in me. Though I do have my secret stash of Wacky Mac macaroni & cheese in my pantry. Am I the only one with a boxed macaroni and cheese stash? Don’t tell anyone.

I had a full day of work yesterday. The kids had a full day of school. I felt my sanity return for a minute.

I came home to my clean kitchen in time for dinner preparation and I felt a sense of normalcy. Never mind the fact that a few hours later I would get another snow day call.

Anyhow, Tuesday is the the day that the local fish store delivers some fresh wild fish right to my front door. I started doing this a few weeks ago to try out. I’m happy to not schlep out at the witching hour and thrilled that I have some fresh fish at my door ready to go. We got some fresh flounder yesterday.

Tuesday also happens to be the day that there is a local farmer’s market outside my office. The winters are slim pickings at the market, but I love to support local farmers and I’m happy to know that my fabulous and local root vegetables were grown locally. I picked up some parsnip and rutabaga. I hope to use the parsnip for soup, but the rutabaga became french fries to go with our dinner. My take on fish and chips.

I’ve roasted rutabaga many times and always love it. I decided to cut it in to french fries and bake them and see what happened. I used my crinkle cut tool in the hopes that my kids would be attracted to the familiar crinkle cut fry look. I was right.

rutabaga-fries-cut-

After tossing the rutabaga in olive oil, salt and pepper, and baking them, my daughter checked out the sheet pan of fries and made a jump for joy. She excitedly pulled out the bottle of ketchup was thrilled to have a great side dish on the menu.

rutabaga-fries

Rutabaga fries are a great low carb alternative to potatoes. They are super easy to make, have a great flavor and when baked, provide a nice crunch.


Baked Rutabaga French Fries
 
Author:
Recipe type: Sides, Appetizer, Low-Carb
Serves: 4-6
Ingredients
  • 2 Large Rutabagas
  • 2 tbsp. olive olive oil
  • 2 tsp. sea salt
  • 2 tsp. ground pepper
  • additional herbs as spices
Instructions
  1. Preheat oven to 400
  2. Wash and peel rutabaga
  3. Slice in to preferred french fry shape
  4. Toss french fries with olive oil and spices
  5. Bake for around 20-25 minutes until the fries get crispy
  6. Serve with ketchup or other dipping sauce.

Rutabaga-French-Fries-Text


Vegetarian Freezer-Friendly Meals

freezer friendly meals

I’m preparing to go to Israel for a couple of weeks for a work conference. So in addition to preparing for the big conference, I’m also preparing the house and the family for my being gone for two weeks. I know that the house can run without me, but I panic. I’ve been gone for a week before, but never two! My husband isn’t a bad cook, but he is limited in the kitchen and has limited time for recipes. I decided that I needed to come up with a food plan ahead of time. I began planning a month in advance. I set aside my Sundays for cooking and freezing a few dishes to ensure that my kids would not be feasting on ramen and Wacky Mac each night. Mind you, they’d be thrilled with those options. I just want some more nutritious options in their bellies. I also wanted to make it easy on my babysitter. A simple reheat makes things uncomplicated. Everything is properly wrapped and labeled. All that needs to be done is a quick chopped salad and dinner is done!

Here are some of the dishes I already have ready to go:

French Onion Soup | Carrot Ginger Soup | Moroccan Lentil Soup | White Bean and Kale Soup | Split Pea Soup | Vegetarian Chili | Vegetable and Black Bean Burritos | Mushroom and Onion Quiche | Baked Mushroom Macaroni and Cheese | Eggplant Pasta Bake | Homemade Pizza Bagels | Veggie Burgers | Veggie Meatballs and Sauce | Quesadilla Pie | Quinoa and Chickpea Loaf | Lentil Sloppy Joes

*Please let me know if you’d like me to post he recipes to any of the above dishes that aren’t already linked
and I will try to make them a future feature.

P.S. If you have any great foodie suggestions in Israel, let me know in the comments below!

While trying to come up with my own menu plan, I sought out some help from many of my foodie friends. Sharing some fantastic ideas with you here! Do you have a favorite freezer-friendly dish? Share them in the comments below.

Soups:

Roasted Winter Vegetable Chowder – Kitchen Treaty

Crockpot Pumpkin Red Lentil Chili – Kitchen Treaty

Slow-Cooked Split Pea Soup – This American Bite

Carrot Soup with Coconut Milk – JewHungry

Roasted Red Pepper Soup – Tales of an Overtime Cook

Main Dishes:

Baked Falafel  – May I Have That Recipe

Pretzel and Cashew Crusted Tofu – May I Have That Recipe

Crepe Lasagna – Because I Like Chocolate

Green Mac & Cheese – The Kosher Foodies

Whole Wheat Cabbage & Mushroom Galette – The Kosher Foodies

Peas and Shells with Vegan Alfredo – JewHungry

Eggplant Casserole – EverydayMaven

Asparagus, Dill & Onion Egg Casserole – EverydayMaven

Sides:

Broccoli Kugel Muffins – Tales of an Overtime Cook

Peach and Cream Cheese Danish

peach-danishIt happened. I baked again. I don’t know what came over me, but out came the beaters and the oven turned on.

Actually, I know what came over me. Peach season happened. Or rather, is happening. I have an abundance of peaches between the CSA and my fruit share from the co-op. My kids are getting sick of the peaches in their bag lunches. I have a hunch that some of the peaches get traded off to some hungry friends. Other peaches manages to be found mushy in the corners of backpacks about a week or two later. I obviously needed a better plan.

I committed to using up my peaches over the weekend. I had to do something before the next batch comes in. I set aside a bunch of peaches for cobblers, but I still had a few left over. I decided to try my hand at some peach danish. I figured the family would appreciate a special breakfast treat, and the peaches would be a welcome addition.

I had some puff pastry in the freezer – so this came together quickly. I defrosted the puff pastry dough.

While the dough softened, I peeled and cubed the peaches and set them aside.

peaches

I then whipped up some cream cheese along with some sugar and egg to make the cheesy filling.

Once the dough was ready, I spread out the dough and spread some cheese filling along the center. I sprinkled some cubed peaches on top. I then cut slits in the dough like in the photo below.

peachandpuff

I criss-crossed the dough pieces over each other.

I then brushed an egg wash over the dough and placed in the oven for about 25 minutes.

This recipe makes two long danish pastries.


Peach and Cream Cheese Danish
 
Author:
Ingredients
  • 2 sheets of puff pastry
  • 10 oz. cream cheese, softened
  • ½ cup sugar
  • 2 egg yolks
  • 1 tsp. vanilla
  • 1 tsp. lemon juice
  • 6 very ripe peaches, peeled and cubed
  • 2 tbsp. sugar
  • 1 egg white for egg wash
Instructions
  1. Preheat oven to 350
  2. Defrost the puff pastry sheets.
  3. In a mixing bowl, whip up the cream cheese, sugar, egg yolks, vanilla and lemon juice.
  4. Make slits in the puff pastry as in the photo.
  5. Spread the cream cheese mixture down the center of the dough sheet.
  6. Arrange cubed peaches on top.
  7. Sprinkle some sugar on top of the peaches.
  8. Seal up the dough as in the photo.
  9. Bake in oven for around 25 minutes. Dough will be light brown.


Product Review: Saffron Road Simmer Sauces

I’m so happy that Passover is over. I had a wonderful holiday, but the long week of holidays left me exhausted. I didn’t really want to look at food. While some people turn to pizza or pasta for their first bite of leavened breads, my first must-have is always some warm Basmati rice. I rarely crave bread or pasta. Rice is something I could eat any day.

tikka-masala-3
When I came upon the Saffron Road simmer sauces at Whole Foods, I was very excited to see that they were kosher certified. I love these kinds of flavorful sauces and usually have to make them from scratch. The fact there there were these packets of sauces and they happened to be kosher, opened a world of dinner possibilities for me. These sauce packets are flavorful and perfect for a busy weeknight.
Saffron Road recently sent me a package with all four varieties of the Simmer Sauces to try. That was a happy mail day! I had to try one of the flavors right away!
lemongrass-basil2I decided to go with the Lemongrass Basil option first. I love Thai curries. Because these sauces are dairy or certified as made on dairy equipment, these could only be prepared with vegetarian proteins in my kosher home. If you don’t keep kosher though, the options are endless. The Lemongrass Basil would be perfect with seafood or chicken. I prepared this dish with tofu and vegetables. The directions were easy to follow and dinner was perfect. It was ready to go in less than 10 minutes! How awesome is that! The Lemongrass Basil sauce is so flavorful and seeped in to the veggies and tofu very well.
For another dinner I prepared the Moroccan Tagine sauce. I added the sauce to a mixture of vegetables and chickpeas and then served over couscous. Again, I was surprised by the level of flavor in this dish! I didn’t expect a shelf stable sauce to pack that much flavor.

saffronroad2

Last, I tried the Tikka Masala sauce packet. I sauteed some veggies and tofu with onion and garlic. When the veggies were ready, I poured in the sauce. I had rice ready to go. Dinner took around 10 minutes to prepare. The veggies and tofu were great. The Tikka Masala has a nice heat level to it, with a bit of underlying sweetness.

All in all, these sauce packets are perfect for a busy night. If they had been certified as kosher pareve, I would have added them to some chicken, and would have expected similarly tasty results.  These Saffron Road sauces are all natural and packed with flavor. I will definitely pick them up again. I am looking forward to seeing what else they have to offer.

VeganMoFo: Black Bean and Avocado Quesadillas

Avocados were on sale at my local store for something like 2/$1. When they get that cheap, I get really excited. So excited – I buy too much. It happens. I’m not complaining. It could have been worse.

So this quick dinner, like most dinners, was brought on by necessity. But it’s amazing what necessity delivered! This dinner worked out perfectly. I wish I had thought of this meal before!
Black Bean and Avocado Quesadillas
Ingredients:
1 tbsp. vegetable oil
1 onion, chopped
3 garlic cloves, chopped
3 tsp. cumin
2 tsp. salt
3 tsp. pepper
1 can black beans, drained and rinsed
2 tbsp. water
1/2 tbsp. vegetable oil
tortillas
1-2 avocados
1/2 lime
Daiya Cheese (optional)
Directions:
Heat oil in medium saute pan.
Add the onions to the pan. Cook for 3-4 minutes on medium high. Add in the garlic cloves and the spices. Cook a couple of more minutes. Add in the drained black beans. Cook for several minutes. Add the extra water if the mixture seems a bit dry. After about 7 minutes, mash some of the beans.  Remove from heat.
Cube up your avocado and sprinkle with lime juice and a tiny bit of salt.
Take a tortilla and spread some of the bean mixture over one half. Layer on top some of the cubed avocado and the optional cheese.  Fold tortilla over.
Heat 1/2 tablespoon of oil in a second pan.
Place folded and stuffed tortilla in pan. Cook for a couple minutes on each side.
Repeat with rest of mixture and tortillas.
Enjoy!
Black Bean and Avocado Quesadillas
veganmofo

Roasted Chickpeas

Behold – the humble can of chickpeas. Only 89 cents. So cheap, and what lies beneath is so so rich.

Have munchies on a Saturday night? This can of chickpeas can achieve greatness. So much greatness, you will wish you had three cans of chickpeas to go around.

Back in college, during a visit to my aunt in Maryland, I was introduced to these crunchy, roasted chickpeas. As a snack – it was so good. I assumed that it was a Moroccan treat and I was in on some awesome snack food secret.

To my dismay – everyone’s doing it. Everyone’s eating these crunchy treats. Probably because it’s so cheap and easy to make.

Roasted Chickpeas
Ingredients:

1 can of chickpeas
1 tbsp. olive oil
salt
cumin, curry, or other spices (you can play with the flavors on this one)

Preheat the oven to 400.

Drain and rinse the chickpeas.

Place the chickpeas on a sheet pan and roll paper towels over the chickpeas to remove the skins.

Toss chickpeas with olive oil and spices.

Bake for around 30-40 minutes  – until browned. 

Sprinkle with salt when done. Serve.

Enjoy!

1 2