Yoplait vs. Chobani 100 Calorie Strawberry Greek Yogurt Taste Off

yogurt tasteoff main.jpg

The fine folks at Yoplait are convinced that their new 100-calorie line of Greek yogurts is so amazing and awesome that they asked me to do a taste-off with Chobani to see which yogurt came out ahead.

I have to admit that I was pretty skeptical from the get-go. Im typically a Fage or Chobani girl, with the occasional Trader Joe’s Greek yogurt thrown in here or there. Yoplait is usually for the kids or something that I grew up with. I just don’t think of Yoplait on a typical day. I was totally curious though.

I’m  a huge Greek yogurt fan. I love the creamy and rich taste of the yogurt and the huge protein burst it gives me. It gives me the energy I need for the day until I break for lunch. I have never had the 100-calorie yogurt options and wasn’t sure what to expect. I was on a business trip recently and they had the regular Yoplait Greek yogurt (not low-calorie) and I wasn’t too impressed. I found it too sweet and not creamy enough. So I went in to this experiment a bit jaded and not so trusting. Could Yoplait make friends with me? Would my longstanding love for Chobani live on?

I bought the strawberry flavor of both brands. I bought a few of each so I could test on the whole family. I had to put the two yogurts side-by-side for the full effect and proceed with the test. Physically, the containers are the same size and shape. No big surprise there. Yogurt containers seem to come in just a few models.

yogurt stacked.jpg


When I opened the package, I peeked in and stirred up the contents. The Yoplait Greek 100 Strawberry seemed to have less in the container, and had settled a bit. It certainly looked creamier and pinker than the Chobani Simply 100 Strawberry. The fruit in the Chobani was on the bottom and had to be stirred up. No surprise there. They are typically fruit on the bottom, while Yoplait tends to often be all mixed up. Based on the color, I actually had to check the ingredient panel right then and there. I’m not a fan of fake food colorings, so I was ready to seethe. My nerves calmed, when I saw that both yogurts used beta carotene and vegetable juice for coloring. No red # whatever. Phewsh!


I took a spoonful of each yogurt. I was expecting a sugar bomb from Yoplait and a natural tart and creamy effect from Chobani.

My mind was blown. My expectations were blown up!

I was actually bothered by the taste in the Chobani. It had a funky off-set taste. I couldside by sode yogurts.jpgn’t quite place it, but I was missing my creaminess. What happened, Chobani? Why have you forsaken me?

Yoplait had the right texture I was seeking in a Greek yogurt. The creamy factor hit me right where it needed to be. The yogurt wasn’t too sweet. It had the right amount of tartness that I’ve come to expect from my Greek yogurts. Yoplait totally blew me away! They were the winner on every aspect that I judge a yogurt by. Whoa!

Mind blown, I sought my family’s judgement. Four out of four panelists agreed. Yoplait was the clear winner! Are you interested in participating in this awesome #tasteoff? Check it out here!

winner is yoplait.jpg


*This taste test was sponsored by Yoplait, but I was given the creative freedom to honestly express my opinions.


Tomatillo Quiche

tomatillo-quiched-baked

I joined an organic co-op this year, and I’ve been loving all of the wonderful fruits and vegetables I am getting. It forces me to get more creative and try new ideas.

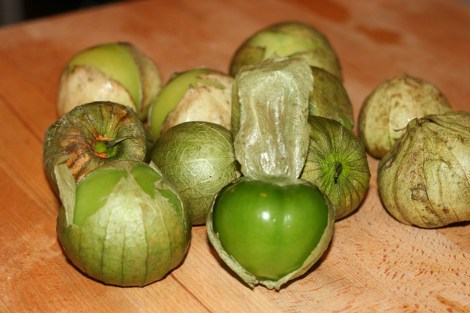
Last week, I got a bunch of tomatillos in my vegetable share. In the past, I’ve turned them in to salsa verde for enchiladas. I wanted to try something different this time.

tomatillo

Like other nights, I looked to my pantry and fridge for ideas. I seemed to have a surplus of organic eggs from my co-op, and I also had some cheese on hand. I knew I could turn this in to a quiche in no time.

I washed and sliced the tomatillos along with some bell pepper, onion, garlic and cilantro. I then sauteed the mixture.

saute-tomatillo

I happened to have some pie crusts in the freezer. I added the cheese to the bottom of the pie crust, then added the veggie mixture, then poured over the egg mixture. In to the oven it went.

tomatillo-quiche-uncooked

It came out perfectly.

I love the bite of the tomatillo. It has a strong, slightly acidic flavor. It works well with the other flavors in the quiche. I highly recommend this for your next dinner.

sliced-quiche


Tomatillo Quiche
 
Author:
Recipe type: Brunch, Dinner, Breakfast
Ingredients
  • 1 tbsp. oilve oil
  • 1 onion, chopped
  • 1 red bell pepper, chopped
  • 6 tomatillos, chopped
  • 3 cloves garlic, chopped
  • 2 tsp. ground black pepper
  • 3 tsp. salt
  • 2 tbsp. chopped fresh cilantro
  • 4 eggs
  • 1 cup half and half
  • 9" Deep Dish Pie Crust
  • ¾ cup shredded cheese (I used a mixture of cheddar and monterey jack)
  • additional salt and pepper as needed
Instructions
  1. Preheat the oven to 375.
  2. Heat up the oil in a large saute pan. Saute the chopped veggies and spices for about 7 minutes, until softened.
  3. Beat the eggs with the half and half in a small mixing bowl.
  4. Sprinkle the shredded cheese in the bottom of the pie crust.
  5. Place the veggie mixture over the cheese.
  6. Pour over the egg mixture.
  7. Place the pie tin on a baking sheet and place in oven. Bake for around 35-40 minutes, until the egg has completely set.
  8. Cool for about 5-10 minutes before serving.
  9. Slice and enjoy!

tomatillo-quiched-baked

Peach and Cream Cheese Danish

peach-danishIt happened. I baked again. I don’t know what came over me, but out came the beaters and the oven turned on.

Actually, I know what came over me. Peach season happened. Or rather, is happening. I have an abundance of peaches between the CSA and my fruit share from the co-op. My kids are getting sick of the peaches in their bag lunches. I have a hunch that some of the peaches get traded off to some hungry friends. Other peaches manages to be found mushy in the corners of backpacks about a week or two later. I obviously needed a better plan.

I committed to using up my peaches over the weekend. I had to do something before the next batch comes in. I set aside a bunch of peaches for cobblers, but I still had a few left over. I decided to try my hand at some peach danish. I figured the family would appreciate a special breakfast treat, and the peaches would be a welcome addition.

I had some puff pastry in the freezer – so this came together quickly. I defrosted the puff pastry dough.

While the dough softened, I peeled and cubed the peaches and set them aside.

peaches

I then whipped up some cream cheese along with some sugar and egg to make the cheesy filling.

Once the dough was ready, I spread out the dough and spread some cheese filling along the center. I sprinkled some cubed peaches on top. I then cut slits in the dough like in the photo below.

peachandpuff

I criss-crossed the dough pieces over each other.

I then brushed an egg wash over the dough and placed in the oven for about 25 minutes.

This recipe makes two long danish pastries.


Peach and Cream Cheese Danish
 
Author:
Ingredients
  • 2 sheets of puff pastry
  • 10 oz. cream cheese, softened
  • ½ cup sugar
  • 2 egg yolks
  • 1 tsp. vanilla
  • 1 tsp. lemon juice
  • 6 very ripe peaches, peeled and cubed
  • 2 tbsp. sugar
  • 1 egg white for egg wash
Instructions
  1. Preheat oven to 350
  2. Defrost the puff pastry sheets.
  3. In a mixing bowl, whip up the cream cheese, sugar, egg yolks, vanilla and lemon juice.
  4. Make slits in the puff pastry as in the photo.
  5. Spread the cream cheese mixture down the center of the dough sheet.
  6. Arrange cubed peaches on top.
  7. Sprinkle some sugar on top of the peaches.
  8. Seal up the dough as in the photo.
  9. Bake in oven for around 25 minutes. Dough will be light brown.


Coffee Oreo Ice Cream

coffee-oreo-ice-cream

The title says it all. How could you go wrong with coffee oreo ice cream? It was a dairy holiday, with the weather warming up. Ice cream had to make it on the menu. I first sampled this flavor either at Sebastian Joe’s in Minneapolis, or Max & Mina’s in Queens. Either way, it’s the perfect flavor combo and I was determined to make it my own.

Around 5 years ago, I received this handy dandy Cuisinart ice cream maker as a token of appreciation for doing some product research stuff. I used to do various focus groups and product testing in my “free time.” My love of kitchen appliances brought me this baby. I think I can count on my hands the number of times I have actually used this appliance. It averages out to two times a summer. Making ice cream is so easy. Not necessarily cheaper than buying it though. Still, it’s wonderful when it’s homemade and Shavuot calls for yummy, delicious, homemade ice cream.

Coffee-Oreo Ice Cream
 
Author:
Recipe type: Dessert, Ice Cream, Frozen
Ingredients
  • 1 cup milk
  • ¾ cup sugar
  • 3 teaspoons instant espresso powder
  • ¼ cup very strong coffee/espresso (ice cold)
  • 2 cups heavy cream
  • 2 teaspoons vanilla extra
  • broken up sandwich cookies (I used Trader Joe's chocolate Joe Joe's) - About 20 or so, maybe more.
Instructions
  1. In a bowl, whisk the milk, sugar, coffee, and espresso powder to combine.
  2. Whisk in the heavy cream and the vanilla.
  3. Pour into the ice cream maker. Turn the machine on.
  4. Let it run a good 20 minutes.
  5. Watch it thicken up and turn into ice cream.
  6. Toss in the cookie pieces. Let it run another 5-10 minutes.
  7. When done, it will be like soft ice cream. Think Carvel. You can enjoy it now, or you can let it freeze and harden a bit more. Enjoy!

coffee-oreo-ice-cream

Potato Leek Soup

Last week I picked up my younger daughter from daycare and was informed that there were some issues with her food and eating. I got all nervous. I couldn’t imagine what the problem could be. I prepare her lunches. I send it to daycare. She is fed. End of story, right? Well, I was wrong. Apparently, her well-meaning teacher is concerned. She doesn’t like that my daughter gets the same rendition of food each week. There is some variety, but I do admit, it is pretty predictable. The teacher was concerned that we were depriving her and decided to take matters in to her own hands. She fed my daughter some of the non-kosher, sodium-filled, school served chicken soup. There was a meeting after school discussing the events of the day. I went home with some guilty-parent syndrome. Maybe I do need to start sending some new lunch options, but what will she eat? So I am on the road to becoming a super-duper lunch maker. For the younger daughter only. The older daughter still insists on peanut butter sandwiches, cream cheese sandwiches, or pasta in a thermos. Ah Well.

Potato Leek Soup is a wonderful hearty and warm soup. It is perfect for chilly winter nights along with a salad. This soup only works when you stick to the recipe. You should never skimp by substituting the butter, or anything else for that matter. It is a very simple soup and comes together in minutes.

Potato Leek Soup
Ingredients:

4 leeks, only the whites, halved, washed, and sliced (Leeks are very sandy – wash carefully)
1 onion, chopped
2 cloves of garlic, chopped
1/2 stick of butter
5 medium potatoes, diced

1 carton of veggie broth, or 4-5 cups
4 cups of water

salt
pepper
2 teaspoons of marjoram


In a large pot, saute the leeks, onions, and garlic in the butter. Cook on medium-low heat for 10 minutes.

Add in the diced potatoes. Stir to coat the potatoe in some of that yummy butter.

Add in the broth, water, and seasonings.

After the soup comes to a boil, turn it to medium-low. Let it simmer for 30 minutes.

After 30 minutes, mash the potatoes and stir, or blend with an immersion blender to your desired consistency. I prefer the blender method.

In crafty news, I knit my first hat!

Pasta with Pesto

The kid must have read my mind when I asked her what she wanted for dinner on the ride home from school. I was overjoyed when her response was “green noodles.” This is 6-year-old speak for pasta with pesto. Next to pasta aglio e olio, pesto is my favorite pasta pair-up. As luck would have it, I had just bought a nice bunch of basil during my lunchtime trek through Chelsea Market.It was extra special to have two miniature assistants to help with the dinner cook-up. Pesto is super easy to make with your food processor. A plate of pasta and a nice salad on the side and you are good for the night.

Pesto
Ingredients:
  • 1 cup basil
  • 4 garlic cloves
  • 1/3 – 1/2 cup of toasted pine nuts
  • 1/2 cup of parmesean (I leave mine out usually to make a pareve pesto, then add parmesean as necessary on a per meal basis) Do not use the powdered processed stuff in a can
  • 1/2 cup of good quality olive oil
  • a sprinkle of salt to taste

Directions:

Wash and sort your basil. Basil is often dirty and sandy.

Combine the dry ingredients in the food processor, then slowly add the olive oil. Dip finger in and taste. Add salt if necessary.

Pesto freezes well. I like to freeze in 1/2 cup increments.


Spoon pesto over and mix into pasta. I add a sprinkle of pine nuts and shredded parmesean. Enjoy with a side salad. Bon Appetit!


1 2