Brussel Sprout, Cauliflower & Mushroom Hash


Can I let you in on a little secret? I’m a little bit obsessed with brussel sprouts. These little cabbage-like balls of goodness are so tasty and so surprisingly versatile. As soon as brussel sprouts are in season, I pounce. Brussel sprouts tend to appear at the local markets sometime in November and I totally dance a little jig when I see that bucket at my favorite market stand for the first time in the seaons. And sometimes, during the fall and winter holidays, I get all silly and buy them on the stalk. Because I am fancy like that. But really, on most days, I toss them with olive oil, garlic, salt and pepper and just let them roast. But not this time. I went all out with my brussel sprouts.

A lunch with my mom this past fall inspired this dish. We went to this funky pub near her hotel where I had a simple brussel sprout hash with eggs and creme fraiche. The lunch was a perfect treat, and its’ simplicity made me really happy. I knew I had to create a dinner inspired by this dish. I knew that cauliflower would work well with brussel sprouts. And well, mushrooms, because mushrooms. I always add mushrooms to everything. Or so it seems.

I started by caramelizing some diced onion and garlic while I shredded up the brussel sprouts. I like buying my brussel sprouts whole and chopping myself, but I wouldn’t hold it against you if you picked up a bag of already shredded brussel sprouts over at Trader Joe’s.

Once the onions were done, I added the shredded sprouts to my cast iron skillet. I let those cook a bit while I chopped up my cauliflower. If you wanted a shortcut here, you could also use a bag of that riced cauliflower. I quickly chopped half a head of cauliflower – stalks and crowns. I added that to the pan and let that cook a few minutes before adding in the chopped mushrooms. I continued to let it cook in the skillet for another 7-10 minutes or so, stirring every so often.

I served this brussel sprout hash over some baby spinach and then topped it with a gloriously fried egg. You can also go for a poached egg, if fried isn’t your style. If you’re vegan or just not in the mood for an egg, you can certainly leave it out. It’s all good. This was dinner in our house, but I could totally see this being served again as breakfast, brunch or lunch as well.

Enjoy!


Brussel Sprout, Cauliflower & Mushroom Hash
 
Author:
Ingredients
  • 1 tbsp. olive oil or butter
  • 1 onion, dice
  • 1 clove garlic, minced
  • 1 tbsp. olive oil or butter (additional)
  • 2 tsp. salt
  • 2 tsp. ground black pepper
  • 1.5 pounds of brussel sprouts, washed and trimmed
  • 4 cups chopped or riced cauliflower
  • 8 oz. cremini or baby bella mushrooms, diced
  • Additional salt and pepper to taste
  • Eggs (optional)
  • Butter for frying the eggs
Instructions
  1. Heat up the oil or butter in a large, deep skillet. I like using my cast iron pan for this.
  2. Turn the heat down to medium-low and add in the onion and garlic let it soften and caramelize.
  3. While the onion cooks, shred the brussel sprouts by halving and slicing thinly.
  4. Add the salt and pepper to the onions.
  5. After about 7 minutes, add in the brussel sprouts. Stir a bit and turn the heat to medium.
  6. Let the brussel sprouts cook down for 3-5 minutes and then stir in the cauliflower and chopped mushrooms.
  7. Mix everything well and let the mixture cook for about 10 minutes.
  8. Taste and adjust seasoning.
  9. Fry up some eggs, sunny side up if you like.
  10. Serve the hash with some fried eggs or salad, or even with some meat - if that's your speed.
  11. Enjoy!


Swiss Chard & Chickpea Curry


So I peeked in my fridge the other night and was saddened by the dire vegetable situation in my kitchen after a long holiday weekend. So I headed out to Trader Joe’s in search of some hope for my cooking situation. Lo’ and behold, the shelves were bare. So I headed down the block to the trusty local kosher grocery store, and amazingly, there was some beautiful fresh swiss chard. It being the beginning of the new year and time for healthy new year’s resolutions and better eating plans, swiss chard is the perfect healthy green to be that representative to ease us into this special moment.

Swiss chard is a fabulous, hearty green that can adapt to any situation. It’s somewhere in between kale and spinach in terms of durability? Can greens be durable? I say, yes. Anyhow, they cook down nicely and pair well with most flavors. It also cooks up quickly, so it’s great for those evenings where you get home at 6pm and dinner needs to be ready before the half hour episode of The Simpsons is over. Am I the only crazy busy mom who does that? I try not to, but to be honest, the occasional park the kid in front of a show moment is the only way that dinner will be cooked and bellies will get filled.

Curry is the perfect wintery dish. It’s comforting, warm, spicy and pretty healthy. And if you follow some of my other recipes on here and also my instagram, you’ve probably seen a fair amount of similar dishes. It’s such an easy meal to turn to as I usually have all of the base ingredients at home already.

I quickly set up some basmati rice to cook. Basmati rice also mostly babysits itself while it cooks.

I sauteed up some onions, garlic and ginger and curry spices. Next, I added in the chopped swiss chard and let that cook down a little bit. I then added some chickpeas, a small amount of broth and some diced tomatoes. I added in a small amount of salt. I let everything simmer for a little bit – five to seven minutes and I was ready to go. By the time the curry was ready, so was the rice.

I tried to keep the heat level on this dish more mild so my kids would eat it, and eat it they did! Hope you enjoy this as well!


Swiss Chard & Chickpea Curry
 
Author:
Ingredients
  • 1 tbsp. vegetable oil
  • 1 onion, chopped
  • 2 cloves garlic, peeled and chopped
  • 2 tbsp. ginger paste
  • 1 tbsp. curry powder
  • 1 tsp. salt
  • half teaspoon turmeric powder
  • 2 tsp teaspoon ground cumin
  • 1 tsp teaspoon ground coriander
  • 1 large bunch of green swiss chard, washed and chopped
  • 1 can of chickpeas, rinsed and drained
  • 1 can diced tomatoes
  • ¼ cup vegetable broth
  • additional salt to taste
Instructions
  1. Heat up the oil in a large pan.
  2. Add in the onions, ginger and garlic and let soften for a couple minutes.
  3. Stir in the spices and cook another minute.
  4. Add in the swiss chard and let it cook down for a few minutes, stirring well.
  5. Add in the drained chickpeas, tomatoes and broth. Stir everything well.
  6. Let simmer for five to seven minutes, stirring every so often.
  7. Taste and add salt as necessary. If you'd like some heat, add in some cayenne or red pepper flakes.
  8. Serve with warm Basmati rice.
  9. Enjoy!

Roasted Beets and Beet Greens with Pasta

roasted beet pasta900

If you’ve been following along on Facebook and Instagram feed, you probably already know all about my CSA and the amazing produce I get each week. I’ve been getting a weekly share from a local farm called Alstedes. Each week it’s like a foodie birthday present. As I pick up the crate of veggies and farm fresh cage-free eggs, I get a huge smile on my face. What am I going to make first out of all the amazing goodies?

I love beets. I love all kinds of beets. The first box that contained beets had me so happy. I had a bunch of red beets from the farmer’s market in my fridge, so when the golden beets came, I was exuberant. I love to see those rings when you cut in to a beet. They’re just so pretty. And the colors? I love it!

beet rounds

I often simply slice or grate beets and put them in a simple salad or side dish, but I decided to include them in something more substantial for dinner. I also wanted to include the beet tops. Did you know that you could eat beet greens? You totally can! Just wash them and eat them raw in a salad, or you can saute them! They’re fantastic and so good for you!

I started out by roasting my beets. I peeled and sliced the beets thinly and tossed in some olive oil, salt and pepper and placed on a baking sheet. I baked at 415 for about 20 minutes – keeping an eye on them so that they didn’t burn.

I cooked up the pasta, reserving some of the pasta cooking water.

I then sliced up both bunches of washed beet greens.

I toasted some pine nuts, then added some olive oil, chopped onion and garlic to the pan.

Next, I added the greens, some salt and pepper.

I love how fast everything cooks up in this dish. The greens take only a few minutes to wilt.

I tossed the cooked pasta in to the pan with a small amount of the cooking water.

I plated the pasta and greens and served with the amazing roasted beets and some goat cheese. So simple, yet so delicious!


Roasted Beets and Beet Greens with Pasta
 
Author:
Ingredients
  • 2 bunches of beets (about 6 medium beets)
  • 1 tbsp. olive oil
  • 1 tsp. salt
  • 1 tsp. pepper
  • ½ cup pine nuts
  • 1 tbsp. olive oil
  • 1 small onion, chopped
  • 3 cloves garlic, minced
  • Beet Greens from two bunches of beets, washed and sliced
  • additional salt and pepper as needed
  • Goat Cheese
  • parmesan cheese (optional)
  • ¾ pound pasta, cooked according to directions on box (reserving some pasta water)
Instructions
  1. Preheat oven to 400.
  2. Peel and slice the beets in to thin rounds. Toss with some olive oil, salt and pepper and place on baking sheet. Roast in oven for 20 minutes.
  3. Cook pasta according to the directions on the box, reserving some pasta water.
  4. Toast pine nuts in large pan for 2 minutes.
  5. Add in the olive oil, salt, pepper, onions and garlic and saute for 3-5 minutes to soften. Add in the beet greens and saute a couple more minutes.
  6. Mix in the cooked pasta and a couple tablespoons of the pasta cooking water.
  7. Plate the pasta and greens. Top with goat cheese, roasted beet rounds and Parmesan Cheese if desired.
  8. Add salt and pepper to taste.
  9. Enjoy!


roastedbeets text

Butternut Squash & Kale Lasagna

finished piece

I am so happy that Passover is over and I have my kitchen back to normal. I have a love/hate relationship with Passover, and I’m just ready for some more low-key time in the kitchen.

This fabulous lasagna brings two of my favorite ingredients together. I love butternut squash and kale in so many ways, be it a hash or a salad. For some reason, they just go together!

This squash was actually purchased for Passover and I had intended to turn it in to this fabulous kosher-for-passover lasagna from Joy of Kosher. It was a huge hit last year, but I just didn’t get the chance to make it this year. So this dish is somewhat inspired by that amazing lasagna.

I like to use the no-boil lasagna pasta sheets because I’m lazy it skips one long step and they seem to work well.

I started by cutting down the squash. I peel off the hard skin and then using my trusty OXO peeler, I peel long strips of squash, using the full length of the squash. For this lasagna, used around 3 cups of squash strips, but you can certainly use more or less.

peeling butternut.jpg

I then cooked my kale and white sauce simultaneously.

I lightly sautéed the chopped kale in olive oil with fresh garlic. I didn’t need it to wilt completely. I just wanted some of the raw edge off of the leaves.

kale

While  the kale cooked down, I tackled the white sauce.

I heated up some olive oil in a pan with garlic, sage, thyme and chopped onion. Once they were soft, I added some flour to the mix, cooked that a bit and then whisked in some milk. Once the mixture thickened, I added some freshly grated parmesan cheese, salt and some black pepper.

I remove both of the pans from the heat.

I then got to work on the lasagna.

I layered each of the ingredients in my pan. This recipe makes a 9×13  or two 8×8 square pans of lasagna. I used the square pans because they were more easily accessible after I was unpacking my kitchen from Pesach mode.

I ladled some of the white sauce on to the bottom of the pan. I then added the pasta sheets. I spread some ricotta cheese over the pasta. I then added the chopped kale, then the thick layer of squash strips, then some sage leaves, then a small sprinkle of mozzarella and then more white sauce. I repeated this layer and when the pan was full and I used up the sauce, I topped everything with shredded parmesan cheese and more mozzarella. I also sprinkled on some more herbs and black pepper.

lasagna layers step by step.jpg

I baked everything in the oven until the cheese was bubbly and beginning to brown. We dug in. Amazing! My husband and daughter had two helpings! Totally making this dish again!

lasagna in 8x8.jpg


Butternut Squash and Kale Lasagna
 
Author:
Recipe type: Dairy, Pasta, Entree
Ingredients
  • 1 medium butternut squash, skin removed
  • 1 package No-Boil Lasagna Sheets
  • Sage Leaves, About 16-20
  • 1 14oz. container of Ricotta Cheese
  • 1 8oz. package of shredded mozzarella cheese
  • Additional Parmesan Cheese
White Sauce
  • 1 tbsp. olive oil
  • 4 cloves garlic, chopped
  • 1 small onion, chopped
  • 6 sage leaves, chopped
  • 3 sprigs of thyme, leaves removed from stem
  • 2 cups of milk
  • 2 tbsp. flour
  • 2 tsp. salt
  • 1 tsp. black pepper
  • ¼ cup parmesan cheese shreds
For the Kale Layer
  • 1 tbsp. olive oil
  • 4 cloves garlic, chopped
  • 3-4 cups chopped kale (I like the bag from Trader Joe's)
  • salt
  • pepper
Instructions
  1. Preheat the oven to 375
  2. Cut the butternut squash lengthwise. I use the peeler to get thin slices of the squash. Peel about 3 cups of squash and set aside.
For the white sauce
  1. Heat up the olive oil in a saucepan and add the chopped onion, garlic and herbs. Once the onion and garlic have softened, add in the flour. Whisk quickly and then turn the heat to medium-low and whisk in the milk. Let the mixture thicken and add in salt, pepper and parmesan cheese. Remove from heat.
For the Kale
  1. Heat up the oil oil in a large pan and add in the garlic and kale. Let the kale saute a bit so it softens. You are just trying to get the edge off a bit. You don't need it to cook down completely.
On to the Lasagna
  1. In a 9x13, ladle a bit of the white sauce to cover the bottom of the pan.
  2. Lay down the lasagna noodles and spread a layer of ricotta cheese over the noodles.
  3. Next, layer the kale then the butternut squash strips with some sage. Sprinkle a small amount of mozzarella over that and then ladle some more white sauce. Repeat the layering process again.
  4. For the final step, ladle the rest of the sauce over the pan and then sprinkle on some more mozzarella and parmesan. Sprinkle on some black pepper to taste and some extra chopped sage and thyme.
  5. Bake for around 40 minutes, or until the cheese is bubbly and beginning to brown.
  6. Enjoy!

 Loading InLinkz ...

lasagantext.jpg

Vegetarian Freezer-Friendly Meals

freezer friendly meals

I’m preparing to go to Israel for a couple of weeks for a work conference. So in addition to preparing for the big conference, I’m also preparing the house and the family for my being gone for two weeks. I know that the house can run without me, but I panic. I’ve been gone for a week before, but never two! My husband isn’t a bad cook, but he is limited in the kitchen and has limited time for recipes. I decided that I needed to come up with a food plan ahead of time. I began planning a month in advance. I set aside my Sundays for cooking and freezing a few dishes to ensure that my kids would not be feasting on ramen and Wacky Mac each night. Mind you, they’d be thrilled with those options. I just want some more nutritious options in their bellies. I also wanted to make it easy on my babysitter. A simple reheat makes things uncomplicated. Everything is properly wrapped and labeled. All that needs to be done is a quick chopped salad and dinner is done!

Here are some of the dishes I already have ready to go:

French Onion Soup | Carrot Ginger Soup | Moroccan Lentil Soup | White Bean and Kale Soup | Split Pea Soup | Vegetarian Chili | Vegetable and Black Bean Burritos | Mushroom and Onion Quiche | Baked Mushroom Macaroni and Cheese | Eggplant Pasta Bake | Homemade Pizza Bagels | Veggie Burgers | Veggie Meatballs and Sauce | Quesadilla Pie | Quinoa and Chickpea Loaf | Lentil Sloppy Joes

*Please let me know if you’d like me to post he recipes to any of the above dishes that aren’t already linked
and I will try to make them a future feature.

P.S. If you have any great foodie suggestions in Israel, let me know in the comments below!

While trying to come up with my own menu plan, I sought out some help from many of my foodie friends. Sharing some fantastic ideas with you here! Do you have a favorite freezer-friendly dish? Share them in the comments below.

Soups:

Roasted Winter Vegetable Chowder – Kitchen Treaty

Crockpot Pumpkin Red Lentil Chili – Kitchen Treaty

Slow-Cooked Split Pea Soup – This American Bite

Carrot Soup with Coconut Milk – JewHungry

Roasted Red Pepper Soup – Tales of an Overtime Cook

Main Dishes:

Baked Falafel  – May I Have That Recipe

Pretzel and Cashew Crusted Tofu – May I Have That Recipe

Crepe Lasagna – Because I Like Chocolate

Green Mac & Cheese – The Kosher Foodies

Whole Wheat Cabbage & Mushroom Galette – The Kosher Foodies

Peas and Shells with Vegan Alfredo – JewHungry

Eggplant Casserole – EverydayMaven

Asparagus, Dill & Onion Egg Casserole – EverydayMaven

Sides:

Broccoli Kugel Muffins – Tales of an Overtime Cook

Tomatillo Quiche

tomatillo-quiched-baked

I joined an organic co-op this year, and I’ve been loving all of the wonderful fruits and vegetables I am getting. It forces me to get more creative and try new ideas.

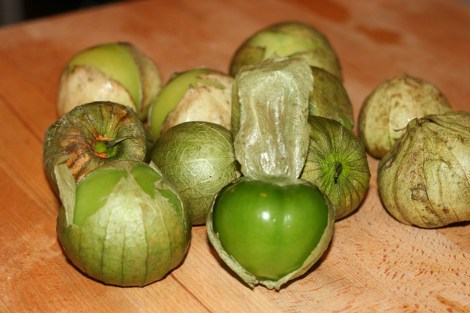
Last week, I got a bunch of tomatillos in my vegetable share. In the past, I’ve turned them in to salsa verde for enchiladas. I wanted to try something different this time.

tomatillo

Like other nights, I looked to my pantry and fridge for ideas. I seemed to have a surplus of organic eggs from my co-op, and I also had some cheese on hand. I knew I could turn this in to a quiche in no time.

I washed and sliced the tomatillos along with some bell pepper, onion, garlic and cilantro. I then sauteed the mixture.

saute-tomatillo

I happened to have some pie crusts in the freezer. I added the cheese to the bottom of the pie crust, then added the veggie mixture, then poured over the egg mixture. In to the oven it went.

tomatillo-quiche-uncooked

It came out perfectly.

I love the bite of the tomatillo. It has a strong, slightly acidic flavor. It works well with the other flavors in the quiche. I highly recommend this for your next dinner.

sliced-quiche


Tomatillo Quiche
 
Author:
Recipe type: Brunch, Dinner, Breakfast
Ingredients
  • 1 tbsp. oilve oil
  • 1 onion, chopped
  • 1 red bell pepper, chopped
  • 6 tomatillos, chopped
  • 3 cloves garlic, chopped
  • 2 tsp. ground black pepper
  • 3 tsp. salt
  • 2 tbsp. chopped fresh cilantro
  • 4 eggs
  • 1 cup half and half
  • 9" Deep Dish Pie Crust
  • ¾ cup shredded cheese (I used a mixture of cheddar and monterey jack)
  • additional salt and pepper as needed
Instructions
  1. Preheat the oven to 375.
  2. Heat up the oil in a large saute pan. Saute the chopped veggies and spices for about 7 minutes, until softened.
  3. Beat the eggs with the half and half in a small mixing bowl.
  4. Sprinkle the shredded cheese in the bottom of the pie crust.
  5. Place the veggie mixture over the cheese.
  6. Pour over the egg mixture.
  7. Place the pie tin on a baking sheet and place in oven. Bake for around 35-40 minutes, until the egg has completely set.
  8. Cool for about 5-10 minutes before serving.
  9. Slice and enjoy!

tomatillo-quiched-baked

Cranberry Glazed Corned Turkey Roast

Cranberry-Turkey

A whole bunch of Jewish holidays just ended and I’m already gearing up for the next set. How did that happen so fast?

This year, in the good ol’ US of A, we have the pleasure of two holidays happening at the same time. Thanksgiving happens to fall on the first night of Chanukah! They say this awesome phenomenon won’t happen for another 79,000 years. Since I don’t plan on being around for the next round of Thanksgivukkah, I thought it best to do something this year to honor the holiday. Two great foodie holidays colliding! I’ve got to do something, right? So stick around this blog. I hope to share a few more Thanksgivukkah recipes with you over the next month.

When I was at the kosher market the other day, they had a display of corned meats. My husband loves corned beef,  and when I saw they had corned turkey roasts, I decided that this would be perfect. I rarely make turkey, so this would be a special treat.  My aunt makes a great corned turkey, and swears that when she makes it, it tastes a bit like ham. I can’t be the judge of that, but this corned turkey came out pretty good, and would be perfect for a Thanksgiving/Chanukah holiday dinner mashup. It’s also great for any shabbat or festive dinner.

The corned turkey comes vaccum-sealed and wrapped in twine. I recommend rinsing the turkey well before cooking. You first boil the turkey for about an hour and a half, then you glaze it and bake it further. I took the twine off before baking, but left it on while I let it simmer. I added some pickling spice and onions to the water bath.

For the glaze, I usually make something similar to what I do for corned beef, but since I have Thanksgiving on my mind, I created a cranberry glaze for this dish. It worked out well! I will definitely do it again!

corned-turkey-cooking


Cranberry Glazed Corned Turkey Roast
 
Author:
Recipe type: Poultry, Thansgiving, Main Course
Ingredients
  • 3 lb corned turkey roast (If you can't get corned turkey where you live, you can substitute corned beef)
  • 2 tbsp. pickling spice
  • 1 onion, sliced
  • ½ can whole berry cranberry sauce
  • ¼ cup brown sugar
  • 2 tbsp. white vinegar
  • 2 tbsp. chopped rosemary
  • 1 tbsp. chopped thyme
  • 2 tsp. chopped ginger
  • 2 tbsp. chili sauce
  • 1 tbsp. chopped garlic
Instructions
  1. Rinse the corned turkey roast.
  2. Place the turkey in a large pot of water. Add the pickling spice and the onion. Bring the water to a boil. Turn down the heat and cover with a lid. Simmer for an hour to and hour and a half.
  3. Preheat the oven to 375.
  4. After the hour and a half, transfer the turkey roast to a baking pan.
  5. Mix up the rest of the ingredients and pour over the turkey.
  6. Bake in the oven for around 40 minutes.
  7. Baste the turkey every 20 minutes with the sauce.
  8. Remove from the oven. Let cool a few minutes.
  9. Slice and serve.
  10. Enjoy!

Cranberry-Turkey

My Favorite Challah

September is a crazy busy month for this lady. September means a busy work schedule, a busy school schedule for the kids and this year, it also means a crazy busy holiday schedule in our house. The Jewish holidays sprung early this year. On one day, it meant searching high and low for the last protractor on this side of New Jersey, while also looking in the depths of every market for a new fruit I haven’t yet eaten.  On other days, it anchors me to my kitchen, dividing my time between my laptop and my stove. I do love this season of Jewish holidays though. As the cool air creeps in, there is this beautiful air of celebration and anticipation of the fall holiday season. Or maybe that’s just the pumpkin spice lattes I’m smelling. Whatever it is, the mood changes. Life is busy, but in a good way.

I recently celebrated the holiday of Rosh Hashanah (the Jewish New Year) as well as the holiday of Yom Kippur (Day of Atonement). Both of these holidays provide me with ample time for reflection and appreciation of the past year as well as the year to come. After the crazy roller-coaster I was on this winter, I am so appreciative and thankful for my good health and for all of the support I had from my friends and family. They’ve been there for me, and I love them for it.

This month’s Kosher Connection link-up is all about Spreading the Joy during this holiday season.

I want to share my challah with you.

Challah

Ever since I was a kid, I have looked forward to Shabbat with my family. Friday night dinner with the family is sacrosanct. You don’t mess with that tradition. It’s not about level of Jewish observance. You just find a way to be at the shabbat table with family and friends, celebrating the end of the week together. Shabbat has been the constant in my life. Through my own various cycles and changes in my own Jewish observance, Shabbat has always meant “home” at the end of a long week.

We come together on Friday evening and light candles, and then sit down together for a warm meal –  over good food, good wine, and good company.  This includes challah. Our special holiday and shabbat bread.

I may not be a baker, but I love making challah. I love the process of working with the dough and getting it just right. I also love some of the spiritual rituals that come with making challah. In Jewish communities around the world, people come together while making challah and use that time to pray for health and wellbeing for loved ones. While preparing the dough, it us customary to keep in mind the names of loved ones who may be unwell or possibly need a job. We say a blessing while keeping the names of these people on our minds.

This past month, I’ve had the opportunity to make challah a few times. Each time, I’ve made challah with a friend who had never made challah before. Somehow, when you make challah around others, it makes this ritual all the more special.

My favorite challah recipe is adapted from a recipe that I found on a bag of flour. Over the past several years, I have tried numerous challah recipes. I’ve had several failures and several successes, but this recipe that I am sharing with you, is a recipe that always results in good challah. You can dress it up with whatever topping you’d like. or you may like to fill it with apples or chocolate chips, like I did for our Rosh Hashanah challahs. On some cool fall days, I have also been known to add some roasted garlic to the mix. Just play with it, and enjoy!


My Favorite Challah
 
adapted from the back of the bag of Glick's flour
Author:
Recipe type: Bread, Shabbat, Jewish Holiday
Ingredients
  • 3.5 tbsp. Active Dry Yeast
  • 5 cups warm water
  • ½ cup sugar
  • 3 tbsp. honey
  • 5 lbs of High Gluten Bread Flour plus extra flour for kneading and shaping (1-2 cups)
  • 3 eggs, beaten
  • ½ cup, plus 2 tbsp. oil
  • 2 tsp. vanilla
  • 2 tbsp. salt
Instructions
  1. Place yeast, sugar, honey and warm water in to a large mixing bowl or in the bowl of your mixer. I used a Bosch for this recipe. Allow the yeast to sit a few minutes until it bubbles.
  2. Add about 6 cups of the flour and mix in to a paste.
  3. Add eggs, ½ cup of oil, vanilla and the salt. Stir together.
  4. Add the rest of the bag of flour and knead for several minutes. The dough may be a little sticky.
  5. Add the 2tbsp, of oil and knead a few more minutes.
  6. If you are using a machine, turn the dough on to a floured counter and knead a few more minutes. You may need to add an additional half a cup of flour. The dough should be smooth and easy to work with.
  7. Oil large bowl and brush oil on the top of the dough and place in the bowl. Cover the dough with a clean kitchen towel or with plastic wrap and allow the dough to rise in a warm place for around 45 minutes. You will need to punch the dough down halfway through. The dough should double in size.
  8. At this point, you can take challah.
  9. Now is the time to shape your challah. I love the various braiding tutorials on the Challah Blog.
  10. Once you've shaped your challah, cover your challahs with plastic wrap or with towels, and place in a warm spot. Allow the challah to rise for another 40 minutes.
  11. Preheat your own to 350.
  12. Brush your challah with an egg wash. Now is the chance to add any toppings like sesame seeds, poppy seeds and other goodies.
  13. Bake your challah at 350 for about 40 minutes.
  14. When you tap on yoiur challah, it should sound hollow. That's a sign of doneness.
  15. Enjoy!

Vietnamese Rice Noodle Salad

Vietnamese-Rice-Noodles-SaladIt’s been crazy hot here on my part of the world. I’m trying to stay away from the stove as much as possible. I’m sure you all can relate.

I’ve been trying to come up with substantial dishes that can be served cool or room temperature that don’t require to much heating up of the kitchen. This especially applies to Shabbat, where I’m tasked with creating and serving multiple dishes for a crowd.

This Vietnamese Rice Noodle dish is a perfect example of a meal-in-a-salad that comes together quickly and is great both warm or cold. It’s also very adaptable. You can swap out some of the veggies and change the protein to whatever you prefer. For this dish, I used turkey. I knew that my guests would be looking for some kind of meat dish and I had the turkey ready to go.

I started by cooking up the rice noodles. I used the thin rice vermicelli, which I can pour boiling water over to cook. Super easy to do. After soaking for around ten minutes, I drained the noodles.

I then cooked up the turkey with some garlic, ginger, shallots and chopped shiitake mushrooms. I love the flavors that comes off of the meat. Once cooked, I added some tamari and lime lime juice to the meat directly.

I chopped up my veggies and made the dressing. I was ready to go.

I mixed the veggies with the noodles and layered the ground turkey over it and then poured on the dressing. Everyone was happy with the salad.

I also make a vegetarian version of this salad. When I do, I swap out the turkey and use chopped tofu or the soy beef-style crumbles. They work well. When I crumble the tofu, I tend to use an extra firm version and add some extra garlic, ginger and soy sauce for extra flavor.

Hope you enjoy!


Vietnamese Rice Noodle Salad
 
Author:
Recipe type: gluten free, salad
Ingredients
  • 1 package vermicelli rice stick noodles
  • 1 tbsp. rice bran oil
  • 4 cloves garlic, chopped
  • 1 shallot, chopped
  • 1 tbsp. ginger, chopped
  • 1 lb. ground turkey
  • juice of ½ lime
  • 2 tsp. tamari
  • 2-3 scallions, chopped
  • 2 tbsp. cilantro, chopped
  • 1 tbsp. mint, chopped
  • 2 carrots, shredded
  • ½ daikon, shredded
  • 1 red pepper, chopped or julienned
  • 1 seedless cucumber, julienned or chopped
  • 1 cubed avocado
  • 2 tsp. red pepper flakes
For the dressing:
  • juice of ½ lime
  • 2 tbsp. rice vinegar
  • 1 tbsp. brown sugar or honey
  • 2 tbsp. tamari
  • 1 tbsp. water
  • ½ tbsp. rice bran oil
  • 1 tbsp. chopped peanuts (optional)
Instructions
  1. Cook the noodles by placing them in a large bowl and pour boiling water over it. Let sit a few minutes, drain and set aside.
  2. Heat up the oil in a large pan and saute the ginger, garlic and shallot.
  3. Add in the ground turkey and chopped shiitake mushrooms and cook until done.
  4. Squeeze the juice of a ½ lime and 2 tsp. tamari or soy sauce over the turkey and mix.
  5. Prep all of the veggies and set aside.
  6. Mix up the dressing ingredients and set aside.
  7. Mix the rice noodles with the veggies and then layer with the ground turkey mixture. Stir in the whisked dressing.
  8. Serve and enjoy!


Vietnamese-Rice-Noodles-Salad

Product Review: Saffron Road Simmer Sauces

I’m so happy that Passover is over. I had a wonderful holiday, but the long week of holidays left me exhausted. I didn’t really want to look at food. While some people turn to pizza or pasta for their first bite of leavened breads, my first must-have is always some warm Basmati rice. I rarely crave bread or pasta. Rice is something I could eat any day.

tikka-masala-3
When I came upon the Saffron Road simmer sauces at Whole Foods, I was very excited to see that they were kosher certified. I love these kinds of flavorful sauces and usually have to make them from scratch. The fact there there were these packets of sauces and they happened to be kosher, opened a world of dinner possibilities for me. These sauce packets are flavorful and perfect for a busy weeknight.
Saffron Road recently sent me a package with all four varieties of the Simmer Sauces to try. That was a happy mail day! I had to try one of the flavors right away!
lemongrass-basil2I decided to go with the Lemongrass Basil option first. I love Thai curries. Because these sauces are dairy or certified as made on dairy equipment, these could only be prepared with vegetarian proteins in my kosher home. If you don’t keep kosher though, the options are endless. The Lemongrass Basil would be perfect with seafood or chicken. I prepared this dish with tofu and vegetables. The directions were easy to follow and dinner was perfect. It was ready to go in less than 10 minutes! How awesome is that! The Lemongrass Basil sauce is so flavorful and seeped in to the veggies and tofu very well.
For another dinner I prepared the Moroccan Tagine sauce. I added the sauce to a mixture of vegetables and chickpeas and then served over couscous. Again, I was surprised by the level of flavor in this dish! I didn’t expect a shelf stable sauce to pack that much flavor.

saffronroad2

Last, I tried the Tikka Masala sauce packet. I sauteed some veggies and tofu with onion and garlic. When the veggies were ready, I poured in the sauce. I had rice ready to go. Dinner took around 10 minutes to prepare. The veggies and tofu were great. The Tikka Masala has a nice heat level to it, with a bit of underlying sweetness.

All in all, these sauce packets are perfect for a busy night. If they had been certified as kosher pareve, I would have added them to some chicken, and would have expected similarly tasty results.  These Saffron Road sauces are all natural and packed with flavor. I will definitely pick them up again. I am looking forward to seeing what else they have to offer.
1 2