Butternut Squash & Kale Lasagna

finished piece

I am so happy that Passover is over and I have my kitchen back to normal. I have a love/hate relationship with Passover, and I’m just ready for some more low-key time in the kitchen.

This fabulous lasagna brings two of my favorite ingredients together. I love butternut squash and kale in so many ways, be it a hash or a salad. For some reason, they just go together!

This squash was actually purchased for Passover and I had intended to turn it in to this fabulous kosher-for-passover lasagna from Joy of Kosher. It was a huge hit last year, but I just didn’t get the chance to make it this year. So this dish is somewhat inspired by that amazing lasagna.

I like to use the no-boil lasagna pasta sheets because I’m lazy it skips one long step and they seem to work well.

I started by cutting down the squash. I peel off the hard skin and then using my trusty OXO peeler, I peel long strips of squash, using the full length of the squash. For this lasagna, used around 3 cups of squash strips, but you can certainly use more or less.

peeling butternut.jpg

I then cooked my kale and white sauce simultaneously.

I lightly sautéed the chopped kale in olive oil with fresh garlic. I didn’t need it to wilt completely. I just wanted some of the raw edge off of the leaves.

kale

While  the kale cooked down, I tackled the white sauce.

I heated up some olive oil in a pan with garlic, sage, thyme and chopped onion. Once they were soft, I added some flour to the mix, cooked that a bit and then whisked in some milk. Once the mixture thickened, I added some freshly grated parmesan cheese, salt and some black pepper.

I remove both of the pans from the heat.

I then got to work on the lasagna.

I layered each of the ingredients in my pan. This recipe makes a 9×13  or two 8×8 square pans of lasagna. I used the square pans because they were more easily accessible after I was unpacking my kitchen from Pesach mode.

I ladled some of the white sauce on to the bottom of the pan. I then added the pasta sheets. I spread some ricotta cheese over the pasta. I then added the chopped kale, then the thick layer of squash strips, then some sage leaves, then a small sprinkle of mozzarella and then more white sauce. I repeated this layer and when the pan was full and I used up the sauce, I topped everything with shredded parmesan cheese and more mozzarella. I also sprinkled on some more herbs and black pepper.

lasagna layers step by step.jpg

I baked everything in the oven until the cheese was bubbly and beginning to brown. We dug in. Amazing! My husband and daughter had two helpings! Totally making this dish again!

lasagna in 8x8.jpg


Butternut Squash and Kale Lasagna
 
Author:
Recipe type: Dairy, Pasta, Entree
Ingredients
  • 1 medium butternut squash, skin removed
  • 1 package No-Boil Lasagna Sheets
  • Sage Leaves, About 16-20
  • 1 14oz. container of Ricotta Cheese
  • 1 8oz. package of shredded mozzarella cheese
  • Additional Parmesan Cheese
White Sauce
  • 1 tbsp. olive oil
  • 4 cloves garlic, chopped
  • 1 small onion, chopped
  • 6 sage leaves, chopped
  • 3 sprigs of thyme, leaves removed from stem
  • 2 cups of milk
  • 2 tbsp. flour
  • 2 tsp. salt
  • 1 tsp. black pepper
  • ¼ cup parmesan cheese shreds
For the Kale Layer
  • 1 tbsp. olive oil
  • 4 cloves garlic, chopped
  • 3-4 cups chopped kale (I like the bag from Trader Joe's)
  • salt
  • pepper
Instructions
  1. Preheat the oven to 375
  2. Cut the butternut squash lengthwise. I use the peeler to get thin slices of the squash. Peel about 3 cups of squash and set aside.
For the white sauce
  1. Heat up the olive oil in a saucepan and add the chopped onion, garlic and herbs. Once the onion and garlic have softened, add in the flour. Whisk quickly and then turn the heat to medium-low and whisk in the milk. Let the mixture thicken and add in salt, pepper and parmesan cheese. Remove from heat.
For the Kale
  1. Heat up the oil oil in a large pan and add in the garlic and kale. Let the kale saute a bit so it softens. You are just trying to get the edge off a bit. You don't need it to cook down completely.
On to the Lasagna
  1. In a 9x13, ladle a bit of the white sauce to cover the bottom of the pan.
  2. Lay down the lasagna noodles and spread a layer of ricotta cheese over the noodles.
  3. Next, layer the kale then the butternut squash strips with some sage. Sprinkle a small amount of mozzarella over that and then ladle some more white sauce. Repeat the layering process again.
  4. For the final step, ladle the rest of the sauce over the pan and then sprinkle on some more mozzarella and parmesan. Sprinkle on some black pepper to taste and some extra chopped sage and thyme.
  5. Bake for around 40 minutes, or until the cheese is bubbly and beginning to brown.
  6. Enjoy!

 Loading InLinkz ...

lasagantext.jpg

Yoplait vs. Chobani 100 Calorie Strawberry Greek Yogurt Taste Off

yogurt tasteoff main.jpg

The fine folks at Yoplait are convinced that their new 100-calorie line of Greek yogurts is so amazing and awesome that they asked me to do a taste-off with Chobani to see which yogurt came out ahead.

I have to admit that I was pretty skeptical from the get-go. Im typically a Fage or Chobani girl, with the occasional Trader Joe’s Greek yogurt thrown in here or there. Yoplait is usually for the kids or something that I grew up with. I just don’t think of Yoplait on a typical day. I was totally curious though.

I’m  a huge Greek yogurt fan. I love the creamy and rich taste of the yogurt and the huge protein burst it gives me. It gives me the energy I need for the day until I break for lunch. I have never had the 100-calorie yogurt options and wasn’t sure what to expect. I was on a business trip recently and they had the regular Yoplait Greek yogurt (not low-calorie) and I wasn’t too impressed. I found it too sweet and not creamy enough. So I went in to this experiment a bit jaded and not so trusting. Could Yoplait make friends with me? Would my longstanding love for Chobani live on?

I bought the strawberry flavor of both brands. I bought a few of each so I could test on the whole family. I had to put the two yogurts side-by-side for the full effect and proceed with the test. Physically, the containers are the same size and shape. No big surprise there. Yogurt containers seem to come in just a few models.

yogurt stacked.jpg


When I opened the package, I peeked in and stirred up the contents. The Yoplait Greek 100 Strawberry seemed to have less in the container, and had settled a bit. It certainly looked creamier and pinker than the Chobani Simply 100 Strawberry. The fruit in the Chobani was on the bottom and had to be stirred up. No surprise there. They are typically fruit on the bottom, while Yoplait tends to often be all mixed up. Based on the color, I actually had to check the ingredient panel right then and there. I’m not a fan of fake food colorings, so I was ready to seethe. My nerves calmed, when I saw that both yogurts used beta carotene and vegetable juice for coloring. No red # whatever. Phewsh!


I took a spoonful of each yogurt. I was expecting a sugar bomb from Yoplait and a natural tart and creamy effect from Chobani.

My mind was blown. My expectations were blown up!

I was actually bothered by the taste in the Chobani. It had a funky off-set taste. I couldside by sode yogurts.jpgn’t quite place it, but I was missing my creaminess. What happened, Chobani? Why have you forsaken me?

Yoplait had the right texture I was seeking in a Greek yogurt. The creamy factor hit me right where it needed to be. The yogurt wasn’t too sweet. It had the right amount of tartness that I’ve come to expect from my Greek yogurts. Yoplait totally blew me away! They were the winner on every aspect that I judge a yogurt by. Whoa!

Mind blown, I sought my family’s judgement. Four out of four panelists agreed. Yoplait was the clear winner! Are you interested in participating in this awesome #tasteoff? Check it out here!

winner is yoplait.jpg


*This taste test was sponsored by Yoplait, but I was given the creative freedom to honestly express my opinions.


Butternut Squash and Kale Hash

Butternut-Squash-Hash

I find myself craving protein lately. By the end of the day, I need a pick-me-up boost of energy. I’m not sure if it’s a cold weather or just a me thing, but my dinner planning tends to be fueled by my energy level at 5:30 in the evening when I get home.

I had half of a butternut squash sitting in my fridge and a bunch of kale. I knew that I needed to use it up. I’m trying to be better about using all of my leftover vegetables and not letting so much go to waste. I was tempted to use some of the squash in a soup, or even just make some simple cubed roasted butternut squash. I still needed a main dish though, and I really wasn’t in the mood for too many dirty pots and pans. Maybe I could get away with just one or two pans? A one-pot meal would be a huge accomplishment.

This dinner kind of just came together. I didn’t know what it would be when I started out, but it turned out to be a sort of hash.

I cubed and peeled my leftover butternut squash and added it to a hot pan. I added some olive oil, onion, garlic and sage as well.

I threw in some vegan beef crumbles to the pan. If you’re not a vegetarian, feel free to add beef or bacon or some other meat product.

I let everything cook. I wanted the butternut squash to get brown and caramelize a bit.

I then poached some eggs in a separate sauce pan and served the eggs on top of the vegetable hash.

The creaminess of the poached egg was the perfect addition to this warm vegetable hash. I will definitely be making this “accidental meal” over again.

Butternut Squash and Kale Hash
 
Author:
Ingredients
  • 4 cups peeled, cubed butternut squash (1-inch cubes)
  • 1 onion, diced
  • 3 cloves garlic, chopped
  • 1 tbsp. fresh sage
  • 2 tsp. ground black pepper
  • 2 tsp. salt
  • 1 lb. vegan beef crumbles
  • 3 cups chopped and stemmed kale
  • eggs for poaching
Instructions
  1. Heat up a large pan with some olive oil.
  2. Add in the butternut squash and the onion and cook for several minutes. Let the squash soften and caramelize.
  3. Add in the garlic, sage, salt, pepper and vegetarian meat crumbles. Let cook for around 5 minutes or so.
  4. Once the mixture is soft, and in the kale and cook a few more minutes.
  5. In a separate pan, heap up some water with a splash of vinegar. Poach the eggs for a few minutes in the water and remove with slotted spoon.
  6. Serve the hash with a poached egg on top.
  7. Enjoy!

squash-hash

Cheddar Sriracha Stuffed Mushrooms: Stuffed Cookbook Review & Giveaway

SruffedChapter3proofs-008

I’ve been following Dan Whalen’s blog, The Food in my Beard, for a while now. I love the way he approaches comfort food. He brings excitement and flavor to our everyday dishes. When I heard about his new cookbook coming out, I knew I had to have it.

The cookbook, Stuffed: The Ultimate Comfort Food Cookbook is genius. Pure genius. I love amazing stuff wrapped in more amazing stuff! I mean who doesn’t? Kind of similar to where I went with my kimchi dumplings. This cookbook features dishes inspired by all ethnicities. From tamales to eclairs, this cookbook has it all. It even has homemade tater tots that totally rival my nacho stuffed tots! I mean, how can you beat fish & chips tater tots? That’s just brilliant!

When the book arrived at my door, I couldn’t open the package fast enough. I knew from Dan’s blog that he dreams up amazing flavor combinations. This book just solidified my stance. Every recipe in the book looks like something work making. The Aloo Gobi Samosas are totally happening in my kitchen soon, as are the Chana Masala Stuffed Grape Leaves.

I’ve been on a bit of a Sriracha kick lately. Well, I’ve always been a fan of it, but it seems to really be getting in to everything I made lately. So when I came upon the Cheddar Sriracha Stuffed Mushrooms, I knew I had to share this recipe with you. Thanks to the amazing publishers, I’ve got a cookbook giveaway for you as well. So be sure to enter the giveaway at the bottom of this post. You can also head on over to Amazon to buy this cookbook. You won’t be disappointed.


Cheddar Sriracha Stuffed Mushrroms
 
Author:
Recipe type: Appetizer
Ingredients
  • 15 to 20 Baby Bella or Cremini Mushrooms
Filling:
  • 1 cup crushed tortilla chips
  • 1 cup shredded cheddar cheese
  • ½ cup Sriracha
  • 1 shallot, minced
  • 2 jalapenos, minced (seeds removed to ease up heat)
Instructions
Make the Filling:
  1. Mix all the ingredients in a bowl
Stuff It:
  1. Clean the mushrooms and remove and the stems and ribs. Generously stuff the mushrooms with the filling.
  2. Put the mushrooms on to a baking dish
Cook It:
  1. Preheat the oven to 400. Roast the mushrooms for about 15 minutes. Serve hot.

  a Rafflecopter giveaway

KIND Healthy Grain Bars

Disclosure: I got this product as part of an advertorial.

oats-and-honey-kind

I was recently sent a box of KIND bars to check out. They came out with a new line of granola bars. You may already be familiar with their fruit and nut bars. I really enjoy them, so I was excited to see what they had in store.

They sent me a variety of flavors to try. Now available are:

  • Dark Chocolate Chunk
  • Peanut Butter Dark Chocolate
  • Vanilla Blueberry
  • Maple Pumpkin Seeds with Sea Salt
  • Oats & Honey with Toasted Coconut

When I opened the box, I zeroed in on the two bars that included chocolate. I mean, who doesn’t love a chocolate chip granola bar?

Since the fine folks at KIND gave me two of each bar to try, I brought some of the extras to work so my buddies could sample and give their opinion as well. They were gobbled up super fast. The KIND logo on the wrapping is already a seal of approval for many, as the brand is known offer good quality. These bars didn’t disappoint.

I thought my favorite would be the dark chocolate chunk flavor, but it turned out to be the oats & honey variety with the coconut. I did love all of them though and will definitely buy them again. I think I like them more than their line of nut bars.

You can learn more about KIND bars and where to buy them by visiting their website.

I received one or more of the products mentioned above for free using Tomoson.com. Regardless, I only recommend products or services I use personally and believe will be good for my readers.

Lemon Lavender Hamentashen

lemon-lavender-hamentashen

Disclosure: I got this silicone baking product mentioned below as part of an advertorial. All opinions and content are my own.

I know I just shared some hamentashen the other day, but since those kimchi hamentashen were savory, I decided to share something sweet with you today. I also wanted to feature my awesome new Cuina Silicone baking mat with you. I figured that freshly baked hamentashen were the perfect way to take advantage of both needs. Stay tuned for the end of this post. You’ll have a chance to win your own Silicone baking mat!

It’s Meyer Lemon season apparently.  I don’t think I’ve ever cooked with them, but I love the taste. They are much sweeter than traditional lemons. When I saw them at the market, I knew I had to incorporate some of them in to my cooking or baking. I’ve been wanting to make lemon curd since I can’t seem to find one that is kosher certified. I was surprised to find out how easy it is to make the curd.

I combined egg yolk with sugar and heated over medium heat, whisking the whole time. I then juiced and zested the lemons and stirred it in to the egg yolks mixture. I stirred for several minutes, letting it thicken then added a stick of butter. You want the mixture to get thick. It should coat the back of your wooden spoon. Once ready. I transferred to jars and chilled in the refrigerator.

lemon-curd-collage

I was debating between lemon rosemary or lemon lavender dough for the hamentashen. I have a foolproof hamentashen dough that I have played with over the years and knew I could make it work for this application. I just had to choose the right herb. I cook with rosemary often, but rarely use lavender – yet I have it in my house. I decided to challenge myself and use the lavender. I know that both herbs work well with lemon anyways, just not necessarily all together.

I mixed up the dough in my Kitchenaid. I then transferred the dough to a rolling mat coated with lots of flour. I rolled out the dough, and with a small drinking glass, I cut rounds of dough. I then shaped in to Hamentashen and transferred to my baking mat lined baking pan.

dough-rounds

Now I want to tell you about this Cuina Kitchen brand silicone baking mat. The fine folks at Cuina Kitchen sent it to me and I was so excited since I had never used one before. I always tend to use parchment paper instead. This silicone baking mat allows you to make cookies without any spray or parchment paper. You just place the mat in your half sheet pan and the cookies go on. They didn’t stick at all! It was so simple. Why did I never buy a baking mat before? Anyways, I highly recommend this silicone baking mat. It worked really well. My cookies came out perfectly and there was no sticky mess to clean up. At the bottom of this post, you’ll have your very own chance to win one of these baking mats!

cuina-kitchen-sheet

Meyer Lemon Curd
 
Author:
Recipe type: spread, sweet
Ingredients
  • 6 egg yolks
  • 1 cup sugar
  • Juice and Zest from 4-5 Meyer Lemons (around ½ cup of juice)
  • 1 stick butter
  • 1 tsp. salt
Instructions
  1. Beat the egg yolks with a form lightly and place in a small heavy-bottomed sauce pan, along with the cup of sugar.
  2. Whisk well over medium heat, letting the sugar melt in.
  3. Add in the lemon juice and zest and stir with a wooden spoon. Let the mixture thicken a bit.
  4. Stir in the butter, keep stirring with the wooden spoon until the back of the spoon is coated in the curd mixture.
  5. Once the curd has thickened, remove from heat, transfer to jars and chill in refrigerator. Enjoy!


  meyerlemoncurd  

Lemon Lavender Hamentashen
 
Author:
Ingredients
  • 1 cup lemon curd (see recipe above)
  • 1 stick butter
  • 1 cup sugar
  • 1 egg
  • 1 tsp. ground vanilla
  • 1 tbsp. lavender
  • 2 tsp. baking powder
  • 2 cups flour (plus more for rolling
  • 1 tsp. salt
Instructions
  1. Preheat the oven to 375.
  2. Cream the butter and sugar together.
  3. Mix in the eggs, vanilla and the lavender.
  4. Add in the dry ingredients and mix well until it forms a dough.
  5. Transfer to a rolling area that has been liberally dusted with flour.
  6. Make sure to dust your hands and rolling pin as well.
  7. In batches, roll out the dough to about a ½-inch thickness. Cut out circles of dough with a glass. Place a teaspoon of the filling at the center of the dough round. Pinch corners in well to form a triangle.
  8. Transfer formed hamentashen to a lined baking mat.
  9. Bake in oven for around 10-11 minutes.
  10. Cool on rack.
  11. Enjoy!

Lemon-Lavender-Hamentashen-Upright

I received one or more of the products mentioned above for free using Tomoson.com. Regardless, I only recommend products or services I use personally and believe will be good for my readers.

a Rafflecopter giveaway

Kimchi Hamentashen Dumplings

kimchi-hamentashen

The Jewish holiday of Purim will be upon us in a few weeks, and I’m in that creative zone thinking about what to prepare. Purim is a very lighthearted holiday. You can learn more about it here.

One of the foods that we traditionally eat on Purim are hamentashen. They are usually triangular filled cookies made to represent the evil Haman from the holiday story. I’ve been making these little cookies since I was a kid, but in the past few years, I’ve been trying to balance the savory and the sweet when making my hamentashen for the Jewish Holiday of Purim. This year was no different.

I’ve been brainstorming various flavors this year and hope to share a few of them with you over the next several days.

This hamentashen came about because I’ve been wanting to make traditional Korean Mandu for a while now. I’m also a huge fan of Kimchi – and from that, kimchi dumplings, of course. It dawned on me last week, that I could possibly turn it in to a hamentashen of sorts. Both are always filled and shaped. Why not? I made some vegan  daikon kimchi a few weeks ago, so these dumplings came together quickly.

I decided to cook them potsticker style so that I could keep the hamentashen dumplings up right, so that it looked like a traditional hamentashen where you can see the filling.

I started by quickly stir-frying some tofu with ginger and garlic. Next, I added in some grated carrots, scallions and Napa cabbage. Once that mixture had softened, I added some of my special radish kimchi. I added enough that it was would contribute a lot of flavor to the mix, but I didn’t want the kimchi to overpower or overheat the dumpling. The smell coming off of the pan is amazing! I seasoned with a small amount of salt – about a teaspoons.

dumpling-filling

When the filling mixture was done cooking, I transferred it to a bowl and let it cool.

I placed a tablespoon of the filling in the dumpling wrappers and then pinched the round dough to form corners, like I’ve done in the past with my hamentashen cookies. I dabbed the corners with a bit of water mixed with corn starch. It helps glue the corners in a bit.

Shaping Kimchi Dumplings

Once I prepared several dumplings, I heated my pan with vegetable and sesame oils. I placed the dumplings in the pan and let them brown a bit. Once they were browned, I added some water to the pan and covered the pan to let them steam. I removed the lid when the water had evaporated.

Prepping and Cooking Dumplings

We then dug in.

Oh my. Now this is a hamentashen to enjoy and be proud of! Definitely making these dumplings and these hamentashen again.


Kimchi Hamentashen Dumplings
 
Author:
Ingredients
  • 2 tsp. vegetable oil
  • 2 tsp. sesame oil
  • ½ lb. super firm tofu, diced small
  • 2 tbsp. ginger, peeled and minced
  • 3 cloves garlic, minced
  • 2 carrots, peeled and grated
  • ¾ cup napa cabbage, chopped
  • ¾ cup daikon kimchi (veganized), chopped (can sub cabbage kimchi if you have that)
  • 2 scallions, sliced thinly
  • 1-2 tsp. salt - as needed
  • dumpling wrappers (I used around 30)
  • ½ cup warm water mixed with a 3 tsp. corn starch (to seal the dumplings)
  • 2 tsp. vegetable oil
  • 2 tsp. sesame oil
  • water for steaming
Dipping Sauce
  • 3 tbsp. tamari
  • 2 tsp. sesame oil
  • 1 tbsp. rice vinegar
  • chopped scallions
Instructions
  1. Heat up the 2 teaspoons of vegetable oil along with the 2 teaspoons of the sesame oil. Add in the tofu and cook for several minutes. Once the tofu is cooked a bit, add in the garlic and ginger.
  2. Let the garlic and ginger get fragrant, then add in the carrots, cabbage and scallions. Let them soften a bit.
  3. Next, add in the chopped kimchi. Stir everything together.
  4. Salt as necessary.
  5. Place a tablespoon of dumpling filling on the dumpling wrapper. Pinch in the corners and seal with the corn starch and water mixture.
  6. Repeat with more dumplings.
  7. Heat the oils in a large pan that has a fitting lid.
  8. Place the dumplings bottom down in the pan and let them brown a bit. Should take a couple of minutes. Once the dumplings have lightly browned on the bottom, pour about ⅔ cup of water in the bottom of the pan and cover pan with a lid to steam the dumplings.
  9. Let the dumplings steams until the water has evaporated completely.
  10. Transfer to a platter. Repeat with any additional dumplings.
  11. Dip the dumplings in a mixture of tamari, sesame oil, rice vinegar and scallions.
  12. Enjoy!

kimchi-hamentashen-dumplings-tall

Lemon Ginger Martini

Lemon-Ginger-Martini

I’ve been obsessed with ginger lately. I love the boost of flavor it brings to a dish and I seem to be adding it to everything. Why not add it to a drink? I love ginger beer. I knew I would love it in other drinks.

I’ve also been building my liquor cabinet and playing with drink recipes lately. My father has always been the bar master in my home growing up. He has a knack for creating amazing cocktails whenever the family entertains. I try to do the same in my home.

My usual drink of choice is a gin & tonic. My gin of choice is Bombay Sapphire. Though I am also known to get creative. Like I did with my Frozen Cantaloupe Mojitos, I like to play with flavor. I was in a martini mood, but wanted to go outside of my typical Dirty Gin Martini. I mean, I love olive juice, but you have to be in the mood, you know?

I’d been craving sweets all day and I had an excess of lemons in the house. Usually when we have extra lemons in the house, we tend to make some lemonade for the kids. I decided it was my turn to enjoy the bounty this time. I decided to make a lemon and ginger simple syrup and make a slightly sweeter gin-based martini.

I juiced 4 lemons, zested some lemon peeled and cut up some ginger and then stirred it in to some water and sugar. I heated everything up and let the sugar dissolve, while letting the flavors combine.

making-simple-syrup

Once the sugar had dissolved and the lemon ginger flavor was well infused, I strained the simple syrup in to a bowl.

straining-simple-syrup

I let the simple syrup cool.

While the mixture cooled, I rimmed my martini glasses with some sugar.

martini-glass-in-sugar

Once the simple syrup was cooled down, I placed some ice in my martini shaker, added about 1/3 cup of the lemon ginger infused simple syrup and then added around a half cup of gin to the shaker. I shook everything and then pour the mixture in to my prepared martini glasses. I also garnished the glasses with some extra lemon zest.

shaker-martini

I couldn’t wait to taste the martini. This lemon ginger martini didn’t disappoint. Amazing! If you’re not a gin fan, swap it for vodka. The drink is fantastic and I encourage you to try it.


Lemon Ginger Martini
 
Author:
Ingredients
Lemon Ginger Simple Syrup
  • Juice of 4 lemons
  • Zest of 1 lemon
  • 2 inches of ginger, peeled and cut up
  • ½ cup sugar
  • ½ cup water
Lemon Ginger Martini (for 2)
  • Ice
  • ½ cup Gin
  • ⅓ cup Lemon Ginger Simple Syrup
  • Sugar to rim the glasses
  • Extra lemon zest strips for garnish
Instructions
Lemon Ginger Simple Syrup
  1. Juice the 4 lemons
  2. In a small sauce pan, mix the lemon juice with the ginger, the water and the sugar
  3. Heat to medium and let the sugar dissolve
  4. Once the sugar has dissolved, remove from flame
  5. Strain the syrup in to a bowl and let cool completely
Lemon Ginger Martini
  1. Rim martini glasses with sugar. Wet the rim of the martini glasses and place the rim of the glass on a plate of sugar to coat the rim,
  2. Place ice in the martini shaker
  3. Add ⅓ cup of the simple syrup and ½ cup gin to the shaker. Shake well.
  4. Pour in to prepared martini glasses.
  5. Garnish with extra lemon zest (optional)
  6. Drink up and enjoy!


lemon-ginger-martini-this-one

 Loading InLinkz ...

Kosher BBQ Tofu Sandwiches


So the weekend is here. Thank goodness. I love the weekends. Time to get stuff done. Time to have fun and relax with my family. Time to eat good food.

We’re in the thick of winter right now on the East Coast. We’ve had snow non-stop. It’s getting a bit ridiculous. Feeling like I’ve been stuck inside way too long. So I’ve been trying to come up with foods that remind me of summer.

bbq-tofu-sandwich

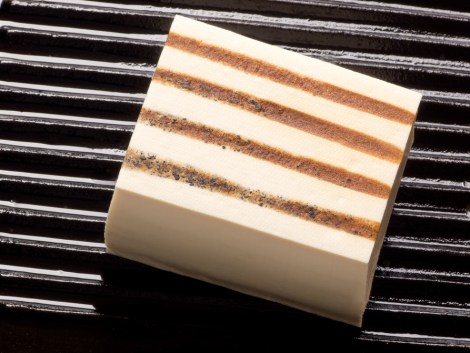
When I think of summer, I think of grilling. I love eating food from the grill.  My father has always been the master of the barbecue. Even in the winter, he heads out to the grill. I thought I’d share with you a fabulous Kosher BBQ Tofu Sandwich that even my father would be proud of. Since it’s vegetarian, the whole family will enjoy it! In the summer, I make this on the grilled, but in the winter, I stay inside with my trusty grill pan.

grilled tofu

Kosher BBQ Tofu Sandwiches
 
Author:
Ingredients
  • 1 (12 ounce) package extra firm Tofu
  • 3 tbsp. Vegetable Oil
  • 1 Onion, thinly sliced
  • Cole Slaw
  • 1 ½ cups BBQ sauce
  • 6 Hamburger buns
Instructions
  1. Start by draining the tofu. To effectively drain it, place tofu on a plate lined with two layers of paper towel. Put two additional paper towels atop the tofu. Afterwards, place a plate with something heavy on it to slowly weigh it all down without crumbling the tofu. Allow it to set for 30 minutes and once all the water has been squeezed out, you can proceed to cutting the tofu. Make sure they are about ¼ inch thick so they would be easier to cook. To ensure that the tofu would be meaty and chewy rather than soft and gooey, it is best to freeze them for an hour. You would notice that the edges would be frozen. Do not thaw them before placing in the skillet.
  2. Heat the vegetable oil in a skillet or non-stick pan. Once hot enough, place the tofu slices and fry until both sides are golden brown; 3-4 minutes is good enough. It is recommended that you shake the pan while cooking so the tofu won’t stick to the pan. Add onions. Pour in BBQ sauce to desired taste. Make sure BBQ sauce is enough to coat the tofu. When you notice that the sauce is setting on the tofu, you’re done. Top with coleslaw and serve on toasted wheat buns.
  3. If you are thinking of pairing this with wine, Chris Murphy, resident wine expert from M&S advises that “The rule of thumb when finding an excellent wine pairing is to try and match the textures of food with the wine, and this works for all cuisines, vegetarian or not.” In this case, the most dominant ingredient is the tofu and sparkling wine like Desroches Champagne (labelled suitable for vegetarians) allows the flavor of tofu to come through.


Massaged Kale and Persimmon Salad

persimmonandkalesalad

I’m always looking for ways to liven up the typical winter fare. I try to cook seasonally as much as possible, but I end up just craving different vegetables after a few straight days of root vegetables. What’s your solution for the winter fruit and vegetable rut?

I find that a leafy and yummy salad can save the day. Changing up your and adding new and interesting ingredients can boost it to a new level.

I love a good massaged kale salad. I tend to always stick to my reliable butternut squash and kale salad, but I wanted something a bit different. I had some Tuscan Kale in my fridge. Tuscan Kale has a bit of a different texture than the traditional kale. The leaves are darker and a little less curly.

I decided to pair it with some radicchio and endive, which I knew needed to be used up.

I was about to toss some butternut squash in the oven, yet again, when I glanced at my fruit basket. I had some beautiful, juicy persimmon waiting to be eaten. Persimmon are a fall and winter fruit. It’s one of my favorite fruits. I had a hunch that the persimmon would pair well with the kale and slightly bitter radicchio.

persimmon

I washed, cut and trimmed the Tuscan Kale. I transferred it to a large bowl and massaged it with some light sprinkle of sea salt.

tuscan-kale

I washed, peeled and sliced up some of the persimmon. The peel of the persimmon can be an irritant for some people.

I mixed up the softened kale with some red onions, radicchio and endive. I topped that mixture with the persimmons and some goat cheese. I love the way chèvre cheese adds a nice creaminess to a salad!

I made a simple olive oil and lemon dressing to go with the salad. I mixed the juice of one lemon with olive oil, salt, pepper, dijon mustard and a small bit of maple syrup.

The salad was delicious! I’m so glad I stepped away from the squash for the night.


Massaged Kale and Persimmon Salad
 
Author:
Recipe type: Salad
Ingredients
For the Salad:
  • 4-5 cups of Tuscane Kale, stems removed, cut up
  • 1 small head of radicchio, chopped
  • 2 small heads of endive, chopped
  • 2 persimmons, peeled and sliced or subed
  • chèvre goat cheese
  • sea salt
Salad Dressing
  • Juice of 1 Lemon
  • ⅔ cup olive oil
  • 2 tsp. dijon mustard
  • salt
  • ground pepper
  • 2 tsp. maple syrup
Instructions
For the salad
  1. Place the washed, cut and stemmed kale in a large bowl
  2. Sprinkle a small amount of sea salt over the kale
  3. With your hands, massage the kale for a few minutes to break down and soften the kale. You can see how I did it here.
  4. Once the kale is ready, add in the chopped radicchio and endive
  5. Add in the persimmons and goat cheese
  6. Mix up the dressing ingredients in a separate container and shake well

persimmon-and-saladt

1 2