Fermented Radishes

Follow my blog with Bloglovin

Fermented Radishes

I’ve recently been studying up more on fermentation. I am learning all about the benefits of fermented foods in my diet. I’ve made kimchi in the past, and enjoyed it, but I didn’t really realize how good it is for you! I started to delve more in to fermentation when I ended up with excess vegetables in my CSA. I didn’t want to risk wasting vegetables that I may not use, so I looked for ways to prolong their life.

I considered canning my vegetables, but I don’t have the patience to deal with the whole jar sterilization and cooking process. Maybe one day.

I learned that fermentation can be very easy, and doesn’t require as many tools as canning. It’s also far less precise than the canning process.

I then learned about the health benefits . Fermented foods are said to aid in digestion, creating a natural probiotic that helps balance your gut. As food ferments, the foods becomes enriched with good enzymes and vitamins. I kept reading, and as I did, I knew I had to give it a try.

I began my summer ferments with some radishes. I had a large amount of beautiful organic radishes from my co-op share and I knew that they wouldn’t all get eaten in salads. I decided that I’d ferment them using a simple 2%  brine base.

Fermented Radishes

I began by cleaning and trimming these beautiful radishes. Then, I sliced them thinly.

sliced-radishes

I washed my jars well and packed the jars with garlic, dill, my sliced radishes and some peppercorns. I then added some of the liquid brine and  sealed the Bell jars and set them aside in a warm, dark corner.

radishes-in-jars

I checked on them every few days to see how they tasted and to make sure that the radishes were still under the liquid brine, pressing them down if they began to pop out.

I kept them in my dark corner of the counter for 2 weeks, at which time, I determined by tasting them, that the radishes were ready and then placed them in my fridge.

They were done and ready to be used. I highly recommend this simple ferment if you are a beginner at fermenting.

Fermented Radishes


Fermented Radishes
 
Author:
Recipe type: Side Dish, Pickles
Ingredients
  • 2 bunches of radishes
  • ½ cup fresh dill
  • 6-8 cloves garlic
  • 1 tbsp. peppercorns
  • 4 cups filtered water
  • 2¾ tbsp sea salt
Instructions
  1. Heat up the water in a pot and add the salt. Let the salt dissolve.
  2. Remove water from heat and let cool completely.
  3. Wash, trim and slice radishes thinly.
  4. Pack the radish slices along with the garlic and dill in to the glass jars. There should be a 1-inch clearance between the tops of the radishes and the lid.
  5. Pour the brine over the radish mixture so that the liquid covers the radishes
  6. Some people like to add a weight or a cabbage leaf on top to ensure that the radishes are completed submerged in the brine mixture. You will have some brine leftover.
  7. Seal the lids tightly.
  8. Place jars in a warm and dark space for up to 2 weeks.
  9. Check on the jars ever 1-2 days, burping the jars and resealing them. This is also the time where you take a taste and see if the radish pickles are sour enough.
  10. When the radishes have reached the desired sourness, move the jars to the fridge.
  11. Enjoy!


Kale and Mushroom Frittata

kale-and-mushroom-frittata

Have I ever told you how much I love the summer’s bounty of fresh greens? Between my CSA and my local farmer’s market, I am able to get some amazing fresh and local goodies. It really pushes me to do more with what I have on hand. It also prevents me from reaching for easy and quick processed foods. I love finding new ways to cook with fresh ingredients. I’ve been having some great results.

My mom taught me about frittatas on a visit when I first became a mother. She showed me how a frittata could be the answer to a fast and easy dinner. It comes together quickly and it’s a pretty forgiving dish – allowing you flexibility with ingredients.

I picked up some amazingly fresh kale at the market and I knew I wanted it to be used for a main dish. I didn’t want it relegated for a simple roasted side dish. I settled on this frittata which did not disappoint.

I chopped up some shallots and garlic and sautéed in olive oil along with some salt, red pepper flakes and fresh ground pepper. I then added some kale and cooked for another few minutes.

Kale and Mushroom Frittata

Next, I added some cut up baby bella mushrooms to the pan and sauteed a few more minutes.

Kale and Mushroom Frittata

I didn’t want to cook the greens and mushrooms too much. I wanted there to be some bite in the finished dish. I beat some eggs with some milk, salt and pepper in a small bowl and then added it to the pan.

kale-with-eggs

I let the eggs set a little bit and then added spoons of goat cheese around the pan.

Kale and Mushroom Frittata

I then transferred the pan to the oven and broiled for a few minutes until set.

I served the frittata with a simple green salad. Delicious! This is perfect for any meal of the day!

frittata-sliced

Kale and Mushroom Frittata
 
Author:
Recipe type: Brunch, Main Dish
Ingredients
  • 1 tbsp. olive oil
  • 2 tsp. sea salt
  • 2 tsp. ground pepper
  • 1 tsp. red pepper flakes
  • 2 shallots, chopped
  • 4 cloves garlic, chopped
  • 3 cups chopped kale
  • 8 oz. baby bella mushrooms, quartered
  • 6 eggs
  • ¾ cup milk
  • 1 tsp. sea salt
  • 1 tsp. ground pepper
  • 4 tbsp. goat cheese
Instructions
  1. Heat olive oil in a large, oven-proof saute pan
  2. Saute the garlic and shallots for a few minutes
  3. Add in the chopped kale and cook for a few minutes.
  4. Add in the mushrooms and cook another 2 minutes.
  5. Mix up the eggs with the milk in a small bowl. Add in the spices.
  6. Pour the egg mixture in to the kale mixture and let set a bit.
  7. Spoon in the goat cheese around the frittata.
  8. Transfer the pan to the oven and broil for about 4-5 minutes, until completely set and the edges have browned a bit.
  9. Slice in to wedges and serve. Enjoy!


Bacon and Onion Stuffed Turkey Burgers

Bacon-and-Onion-Stuffed-Turkey-Burgers

It may be shocking to see me posting a meat recipe. It happens once in a while. It’s grilling season. You got to cook up some burgers during grilling season!

When I do buy and cook meat, I like to know that my meat is coming from a good place. Kind of like the chicken on the Portlandia episode. Well, I’m not that intense. I do like to know though, that the animals were treated well and fed well. I prefer to only buy sustainable, pasture-raised and grass-fed meats when possible. That’s where KOL Foods comes in to play. They have an amazing selection of pastured and grass-fed meats and poultry. You can read more about them here.

They recently sent me some beef bacon and ground turkey. I was so excited when the meats showed up. I had a few things in mind as to what to create.

Being that July 4th, Independence Day, is almost upon us, I thought I would share a treat that’s perfect for your family barbecues. These bacon and onion stuffed turkey burgers come together fairly painlessly and you will reap the rewards with the amazing flavor.

Earlier in the day, I stepped on to my deck to pick some herbs for my burgers. I like using sage, rosemary, parsley  and thyme whenever I mix up some burger meat.

In one pan, I began to caramelize some onions and garlic. I love caramelized onions both on and in the burger.

Bacon and Onion Stuffed Turkey Burgers

In another grill pan, I began to fry up the bacon. Half of the bacon was reserved for garnishing the burgers, but the other half would be going in the burgers.

Bacon and Onion Stuffed Turkey Burgers

I let both the bacon and the onions cool a bit.

In the bacon pan, I sliced up some portabello mushrooms and grilled them.

I began to mix up my burgers. I mixed the ground turkey with chopped onion, garlic, salt, pepper, rosemary, parsley, thyme and sage. I then added some gluten free oats, vegan worcestershire sauce and an egg to the mix. I mixed everything well. If you are not gluten free, feel free to add some bread crumbs or panko crumbs instead. I wanted to keep these gluten free for me.

Bacon and Onion Stuffed Turkey Burgers

I crumbled up half of the cooked bacon.

Bacon and Onion Stuffed Turkey Burgers

I formed some of the burger mixture in to a patty and then placed about a tablespoon of chopped bacon and a tablespoon of onions in the center of the formed patty. I then placed more of the burger mixture over it and sealed the bacon and onions in.

Bacon and Onion Stuffed Turkey Burgers

I managed to get 7 burgers out of this mixture.

Bacon and Onion Stuffed Turkey Burgers

I then grilled the burgers in my grill pan until done. (You can use the BBQ. It was raining that day)

Burgers-Grilling

I served up the burgers with additional bacon, onion, mushrooms, spinach and avocado. Oh my. That burger was amazing! You must make it!

As far as KOL Foods goes, they are amazing. I found that the meats and poultry are much more flavorful than the traditional store-bought varieties. The turkey tastes like turkey and the no-nitrite bacon was incredibly flavorful. I really loved the meats I received from them and am excited to order and cook from them again soon. Thank you, KOL Foods!

Bacon and Onion Stuffed Turkey Burgers
 
Author:
Ingredients
  • 1 tbsp. olive oil
  • 1 tsp. salt
  • 1 large vidalia onion, sliced
  • 1 large spanish onion, sliced
  • 1 large red onion, sliced
  • 5 cloves garlic, chopped
  • 1 lb. of bacon (beef or pork) - half will be used in the burger, other half to top burger
  • 1 pound of mushrooms (portabella or baby bella), sliced
  • 2 lb. ground turkey
  • 1 tbsp. worcestershire sauce
  • 1 small onion, chopped
  • 2 cloves garlic, chopped
  • 1 tbsp. fresh parsley, chopped
  • 1 tbsp. fresh rosemary, chopped
  • 1 tbsp. fresh sage, chopped
  • ½ tbsp. fresh thyme
  • 1 tsp. salt
  • 1 tsp. fresh ground pepper
  • 1 extra large egg
  • ½ cup gluten free oats or bread crumbs
  • 1 tbsp. olive oil
  • Recommended Burger Toppings:
  • Avocado
  • Bacon
  • spinach or arugula
  • caramelized onions
  • grilled mushrooms
Instructions
  1. In one pan, heat up some olive oil. Add the onions, garlic, salt and pepper. Cook on medium until the onions are caramelized. Set pan aside when done.
  2. In another pan, cook the bacon. Because the bacon is fatty, you don't need to add any oil. Cook the bacon until crisp. Drain on paper towels and set aside.
  3. In that same grill pan, grill the mushrooms until nicely browned. Set aside.
  4. Crumble up half of the bacon.
  5. In a mixing bowl, mix up the ground turkey with the fresh herbs, the egg, the oats or bread crumbs, the worcestershire sauce, salt and pepper.
  6. Form the burger in to a small patty.
  7. Place a tablespoon of the crumbled bacon and the caramelized onions in center of each patty. Top and seal with additional burger mixture.
  8. Cook burger on a barbecue or on a grill pan until done.
  9. Top with your favorite burger toppings.
  10. Enjoy!

Bacon-and-Onion-Stuffed-Turkey-Burgers


Frozen Cantaloupe Mojitos

Frozen Cantaloupe Mint Mojitos

I recently received a cantaloupe in my organic fruit co-op. I wasn’t quite sure what I would do with it. My kids aren’t the biggest melon fans, so I knew I couldn’t just slice it up and serve for breakfasts.

Frozen Cantaloupe Mint Mojitos

I cut it up in small pieces, bagged it up and placed in the freezer. I figured that I would use it for a smoothie or something along those lines later on.

Later that evening though, we had some impromptu guests and I decided to see if it would work in an adult drink.

My favorite summer drink is a mint mojito. I have a crazy amount of mint growing in my herb garden. In past summers, my frozen mint mojito has been a huge success. I decided to experiment with the cantaloupe thrown in and was very pleased.

While the cantaloupe pieces sat in the freezer, I went outside to pick some mint and made up a small batch of simple syrup.

I placed the frozen cantaloupe in my blender along with some fresh mint leaves, some lime juice and simple syrup. I muddled the mixture a bit. I then added a few ice cubes and some Bacardi white rum. I knew then that it would be great!


mojito-blender

I blended everything together until it was the right consistency. I tasted a bit to see if it needed anything. It was perfect. I then served with a garnish of mint leaves.

I definitely need to make these more often!

Frozen Cantaloupe Mojitos
 
Author:
Recipe type: Cocktail
Serves: 2
Ingredients
  • ½ cantaloupe, cut up
  • 15 mint leaves
  • ½ cup simple syrup
  • ½ cup white rum (I also use Bacardi)
  • 1 cup ice cubes
  • juice of 2 limes
Instructions
  1. Cut up the cantaloupe and freeze the pieces for at least 3-4 hours
  2. Place the mint leaves, the cantaloupe, the lime juice and the simple syrup in the blender.
  3. Muddle the mixture a bit to bring out the flavor.
  4. Add in the ice cubes and rum.
  5. Blend until you reach desired consistency.
  6. Serve and garnish with extra mint leaves.
  7. Enjoy!

cantaloupe-mojitos

Creamy Vegan Dill Salad Dressing

vegandilldressing

With my bounty of amazing salad greens from my CSA, I’ve been making salads most nights for the next day’s lunch. The other night, I had run out of vinaigrette, and was trying to decide what kind of dressing to make next.

I had just received a a huge amount of dill in that week’s veggie share. I was still wondering what I should do with it. It then occurred to me to use a small amount of it in to a salad dressing. I remember having a great creamy dill dressing. I wanted to recreate it in some way, but I didn’t want it to be the same gloopy dressing. I just wanted some of that flavor.

I’ve noticed that many creamy salad dressings tend to include either a sour cream or buttermilk on the dairy side. On the non-dairy side, I am always seeing mayonaisse in dressings. I didn’t want either of those things.

I wanted something vegan.

I thought about the cashew sauce I made for pasta this winter. The cashew cream brought so much creaminess to the dish. I wondered if I could do something similar with a salad dressing.

I quickly grabbed some cashews out of the freezer and began soaking. I let them soak for about an hour and prepped the other ingredients.

After about an hour, I drained the cashews and placed in my Cuisinart Food Processor along with some shallots, garlic, dill, salt, pepper and water.  With the machine running, I then slowly added some olive oil to the mix.  This dressing would also work well in a high-powered blender.

I transferred the dressing to a jar. Of course I tried a bit before placing in the fridge to chill for the next day. Delicious! I am definitely going to use cashews more often to add creaminess to dressings!


Creamy Vegan Dill Salad Dressing
 
Prep time
Cook time
Total time
 
Author:
Recipe type: Salad Dressing
Serves: 6-8
Ingredients
  • ½ cup cashews
  • water for soaking
  • ½ cup chopped fresh dill
  • 1 shallot
  • 2 cloves garlic
  • 2 tsp. salt
  • 2 tsp. fresh ground pepper
  • ¾ cup water
  • 2 tbsp. lemon juice
  • ½ cup olive oil
  • additional salt and pepper to taste
Instructions
  1. Soak the cashews in water to cover for at least an hour.
  2. Drain and rinse the cashews.
  3. Place all of the ingredients except for the olive oil in a blender or food processor.
  4. Process the dressing. Slowly add in the olive oil with the processor or blender going.
  5. Transfer the dressing to a bottle.
  6. Store in refrigerator.
  7. Enjoy!

vegandilldressing

Spinach and Beet Salad with Goat Cheese

http://www.salutbaramericain.com/

I never used to be a salad person. I would eat it and enjoy it, but I never really sought it out or really appreciated it. It wasn’t until I couldn’t eat salad that I started to crave it and get more creative with salad. Crohn’s has kept me away from raw vegetables on and off at different spurts in my life. So here I am now, Crohn’s free, and taking full advantage of this lull in my life. Summer has come on with full force and with that, we have some beautiful veggies showing up in the markets. Baby spinach is one of my favorite greens. You may have noticed that it shows up in some of my favorite dishes.

Since it’s summer time, I like to eat more fresh dishes that don’t require heating up the house.

I think it was my sister that introduced me to this Spinach and Beet Salad with Chèvre and Walnuts. I ate it on one of my visits back home to Minneapolis. Since then, I order this salad on whatever menu I see it on. I decided to make it myself. I had recently received some beautiful beets in the CSA and I had everything else in the fridge.

The spinach I used in this salad was prewashed and ready to go. I roasted some beets and I toasted some walnuts in the oven.

I served the salad with a red wine, basil  and shallot vinaigrette that I quickly whipped up in my Cuisinart Mini-Prep processor.

red-wine-vinaigrette


Spinach and Beet Salad with Goat Cheese
 
Author:
Recipe type: Salad
Serves: 4
Ingredients
  • 1 small bunch of beets (about 4-5 small beets)
  • 1 bag of pre-washed baby spinach
  • 1 cup walnuts
  • 1 small red onion, sliced thinly
  • 1 tbsp. olive oil
  • sea salt
  • fresh ground pepper
  • goat cheese (Chèvre)
Instructions
  1. Preheat oven to 375.
  2. Trim off the ends of the beets and place in foil. Sprinkle olive oil over the beets and sprinkle with salt and pepper. Wrap in the foil.
  3. Roast the beets in the oven for about 40 minutes.
  4. Remove from oven and cool.
  5. While the beets cool, place the walnuts on some foil and toast in the oven for about 5 minutes.
  6. Remove from oven and cool.
  7. When cooled down, slice the beets thinly.
  8. Layer the salad - first the spinach, then the beets, then the onions and walnuts, then the goat cheese.
  9. Sprinkle on a dressing of your choice. I would recommend a red wine vinaigrette.


Red Wine, Basil and Shallot Vinaigrette
 
Author:
Recipe type: Salad Dressing
Ingredients
  • 1 shallot
  • 2 cloves garlic
  • 15 basil leaves
  • 5 tbsp. red wine vinegar
  • 2 tbsp. honey
  • ½ cup olive oil
  • 2 tsp. sea salt
  • 2 tsp. fresh ground black pepper
Instructions
  1. Place everything except for the olive oil in to the food processor.
  2. Start blending the mixture.
  3. Slowly pour in the olive oil and let the mixture emulsify.
  4. Transfer dressing to a container.
  5. Enjoy on your favorite salad.

spinach-and-beet-salad


Chilled Pea and Basil Soup

chilled-pea-soup

This month’s Kosher Connection link-up features chilled soups.  It’s June, and the weather is heating up. Always happy to have a cool treat.

I love challenges like this. I never really make cold soup. I do love a good gazpacho every so often, but chilled soups don’t really happen in this kitchen. If I made hot chicken soup every week in the summer, nobody would complain. We’re just a warm soup kind of family and a little heat doesn’t usually stop me. Myself excluded that is. I’m not in to warm soups on a hot day.

This challenge got me thinking about different flavors that I love. I wasn’t going to do a gazpacho. That’s been done. I have several friends that love chilled fruit soups, but that’s just not me.  I thought about the various herbs that I have growing on my deck and then looked to the beautiful early summer veggies I’ve been seeing at the farmer’s markets. I knew I had to focus on some seasonal vegetables and herbs. At the market today, I came upon some beautiful peas. Yum! These English peas were amazing and so sweet. I then turned to my favorite herb  – my basil plant. I had to turn these two in to soup.

I began by sauteeing up some shallots and garlic in a bit of butter and olive oil. I then added the peas and the chopped basil. After they cook for a few minutes, I added in some vegetable broth and let the soup cook a bit.

peasoupbroth

Once the peas were sufficiently cooked, I pureed the soup with my immersion blender and added some Greek yogurt to the soup.

peasoup-immersion-blender

I removed the soup from the heat and then began to cool it down. If you’d like, you can transfer the soup to a bowl and then sit it over a larger bowl of ice for a quick chill down.

I served the soup chilled with some additional Greek yogurt stirred in. Love the flavor. The sweetness of the peas combined with the basil really work well together. Will definitely make this again.

chilled-pea-soup

Chilled Pea and Basil Soup
 
Prep time
Cook time
Total time
 
Author:
Recipe type: Soup
Cuisine: Summer Soups
Serves: 6
Ingredients
  • 1 tbsp. butter
  • 1 tbsp. olive oil
  • 1 shallot, chopped
  • 2 cloves garlic, chopped
  • 2 tsp. salt
  • 2 tsp fresh ground pepper
  • ¾ pound English peas (or use frozen petite peas)
  • 1 cup chopped basil
  • 2 cups vegetable broth
  • 2 tbsp. Greek yogurt or sour cream (plus extra for garnishing)
  • additional salt and pepper to taste
Instructions
  1. Heat up the butter and olive oil in a medium-size pot.
  2. Add in the garlic and shallot and saute until soft.
  3. Stir in the salt and pepper.
  4. Stir in the peas and the basil. Saute or a minute or two.
  5. Add in the vegetable broth.
  6. Let the mixture come to a boil. Cover the pot and turn down the heat.
  7. Cook for about 7 minutes.
  8. After about 7 minutes, the peas should be cooked enough.
  9. Use a standard blender or an immersion blender to puree the soup.
  10. Stir in some Greek yogurt.
  11. Taste the soup a bit. Add additional salt and pepper as needed.
  12. Serve the soup garnished with additional basil and yogurt.
  13. Enjoy!


Don’t forget to check out some of the other great cold soups as part of the Kosher Connection link-up!


Wasabi Salmon Burger Wraps

We had some leftover salmon from the other night. I wanted to use it up, but I am very bad about using leftovers. I just don’t like them. Salmon is one thing that I do use though. I usually like to turn it in to a salmon salad the next day. This time around though, I decided to turn it in to some salmon burgers. Similar to my baked salmon patties, you can use either recently cooked salmon or even some canned salmon. Both will work, but I always prefer to use fresh salmon when possible.

This salmon burger comes together in a similar way as the salmon patties, but the flavors are amped up a bit with the addition of the wasabi and ginger.

Salmon Burger Wraps

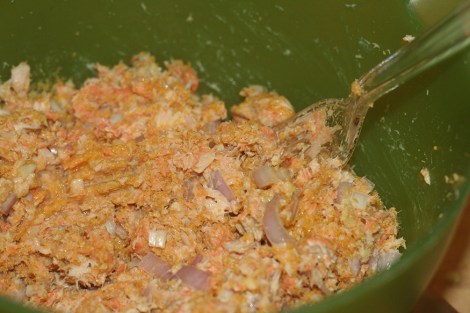
I mashed up my leftover fresh salmon in a bowl. You can use canned salmon if you don’t have fresh salmon lying around. To the salmon, add an egg, some wasabi, soy sauce, sesame soil, ginger, garlic, corn flake crumbs, chopped shallots. You mix it together and form in to burgers.

Salmon Burger Wraps

Fry the burgers in a large pan.

Salmon Burger Wraps

Serve in wraps with avocado, spinach, additional wasabi and mayonnaise.  So good! Make it now!

Salmon Burger Wraps

Wasabi Salmon Burger Wraps
 
Author:
Recipe type: Sandwich, Burger, Lunch, Main Course
Ingredients
  • 12 oz cooked salmon or 2 - 6 oz cans of salmon
  • 1 shallot, chopped
  • 2 tsp. ginger paste
  • 2 tsp. garlic paste
  • 1 extra large egg
  • 2 tbsp. wasabi
  • 1 tbsp. mayonaisse
  • ¾ cup corn flake crumbs
  • 1 tsp. sesame oil
  • 1 tsp. soy sauce
  • 1 tsp. sriracha
  • Tortillas (I had mine in brown rice tortillas, while my family likes flour tortillas)
  • Avocados, sliced
  • Baby Spinach Leaves
Instructions
  1. In a medium mixing bowl, mash up the salmon with a fork
  2. Mix in the rest of the ingredients. Mix well.
  3. Form in to patties/burgers.
  4. Grill on a barbecue, or fry in a large fry pan on medium-high heat in one tablespoon of oil. The burgers should be lightly browned on both sides.
  5. Wrap up the burgers in a tortilla with additional wasabi or sriracha, some mayonnaise, some sliced avocado and spinach.
  6. Enjoy!


Baked Salmon with Ramps

As  you can see, I am still using up some of those ramps. I literally went on a ramp cooking frenzy – trying to work the flavor of the ramps in to anything possible. You see, ramp season is only around for a short time. You need to take advantage of the Spring season for these wild leeks as much as possible.

I recently picked up some amazing salmon. I had a bit over a pound of salmon, and it being so perfect and so fresh, I knew I had to cook it just right.

Baked-Salmon

I made up a mixture of garlic, lemon juice, salt, pepper, honey and chopped ramps. I rubbed the mixture on the salmon and placed it in the oven. It was that simple!

The simple seasoning, along with the fabulous chopped ramps, gave this dish a wonderful flavor. To round it all out, I served the salmon over a bed of wasabi microgreens. This was an amazing dinner.

Baked-Salmon-with-Wasabi-Microgreens


Baked Salmon with Ramps
 
Author:
Recipe type: Main Course, Fish
Ingredients
  • 1½ lb. salmon filets
  • juice of one lemon
  • rind of ½ lemon
  • 4 ramps, trimmed and chopped
  • 2 cloves garlic, chopped
  • 2 tbsp. honey
  • 1 tbsp olive oil
  • 2 tsp. sea salt
  • 2 tsp. fresh ground pepper
  • 1 tsp. red pepper flakes (optional)
Instructions
  1. Preheat the oven to 375.
  2. Place the salmon in a baking dish
  3. Sprinkle the salmon with salt and pepper
  4. Mix together the lemon juice, olive oil and honey
  5. Stir in the chopped garlic
  6. Pour the mixture over the salmon
  7. Add the red pepper flakes (if desired)
  8. Sprinkle the chopped ramps and lemon rind all over the top of the salmon
  9. Bake the salmon at 375 for about 13 minutes - check on the salmon. You don't want to overcook it.
  10. I served this salmon over some wasabi microgreens, but you can serve however you'd like
  11. Enjoy!


Italian Sausage and Lentils with Spinach and Mushrooms

I need to begin by telling you something. I just have to get it off my chest. This recipe came about by accident. It was a happy accident.

It was one of those nights where all of my well thought-out dinner plans were tossed out the window due to unforeseen circumstances. A rain storm, some traffic, a dying fridge. Everything contributed. Somehow though, things fell in to place.

I often keep some precooked protein as a starting block on hand. Be it tofu, seitan or some cooked beans. I had a few cups of cooked French Green Lentils. Further back on the fridge shelf, I noticed a package of Italian Sausage flavored Tofurky. Double score! I was doing better than I thought.

It being a chilly and rainy day, my older daughter had a special request for some lentil soup. While I patiently explained that I didn’t have time for soup making, I assured her that the lentils would work well for dinner and that dinner could be on the table in less than a half hour.

I began by sauteeing some onions and garlic in olive oil. I then added the faux sausage to brown. After, I added some sliced Baby Bella mushrooms along with the lentils and some herbs. It started to smell pretty good in my kitchen.

sausage-and-lentil-mixture

I then added some canned, diced tomatoes to the mix along with the spinach, and I was just about ready to serve.

My kids ate this over some mini-penne pasta, while I had it as-is. I hope you enjoy this dish as much as I did.

Lentils and Sausage over Pasta


Italian Sausage and Lentils with Spinach and Mushrooms
 
Author:
Recipe type: Main Course
Ingredients
  • 1 tbsp. olive oil
  • 1 onion, chopped
  • 5 cloves garlic, chopped
  • 1 package of Italian Sausage Tofurky or 1 pound of your favorite Italian Sausage, sliced
  • 8 oz. Baby Bella mushrooms, sliced
  • 2 cups cooked French green lentils
  • 8 oz. baby spinach
  • 2 tbsp basil, chopped
  • 1 tbsp. oregano, chopped
  • ½ tbsp. salt
  • 2 tsp. fresh ground pepper
  • 1 can diced tomatoes (I liked the kind flavored with garlic and basil)
  • additional salt and pepper to taste
  • 2 tsp. red pepper flakes (optional)
Instructions
  1. Heat up the saute pan for a few minutes. Add in the olive oil.
  2. Add in the onions and garlic and saute for a few minutes.
  3. Add in the sliced sausage and cook for about 5 minutes.
  4. Add in the mushrooms and cooked lentils. Cook for another 5 minutes, stirring until mushrooms have softened.
  5. Add in the canned diced tomatoes and the spices. Cook for two minutes.
  6. Stir in the spinach until wilted.
  7. Taste the mixture.
  8. Add in additional salt and pepper as needed.
  9. Enjoy!


1 2