Creamy Tomato Soup & Loaded Grilled Cheese

Grilled-Cheese

This month’s Kosher Connection link-up is all about comfort food. I had a hard time decided just which food I should share with you. I decided to share with you a food and a memory that brings comfort to me. Be sure to scroll all the way down to the end of this post to see some other great recipes from my fellow Kosher Connection bloggers!

I have several defining food moments of my life. Many of them revolve around lazy Sundays with my family. My parents would both be cooking in the kitchen and my sisters and I would be running from room to room taking in the delicious smells, and probably engaged in some sibling rivalry.

Sundays were days filled with a bustle of activity. Our days were spent running from swimming to pottery to theater at the JCC, and then home for a warm supper around the family table. One of my dad’s specialties is a loaded grilled cheese sandwich. My sisters and I would gobble that sandwich up.

This grilled cheese was never just standard white bread and American cheese. It was always filled with surprises. Some days it would be tomato and onion within the gooey cheese. Other days, we might find a sprinkling of sunflower seeds hidden inside. We always enjoyed it.

Later in college, whenever I was in the mood for that taste of home,  I would order up a grilled cheese sandwich. Like during my childhood, it always had stuff in it. It was often filled with provolone, onions and mushrooms. On a rainy day, I would add a cup of soup to the meal. I learned to love creamy tomato soup on those rainy New York days. Dipping a corner of grilled cheese in to that soup and chowing down – that spelled out a bit of heaven.

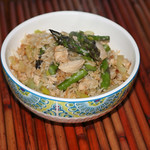
Pure comfort on a plate.

I thought I’d share this fabulous meal with you today.

Creamy Tomato Soup
 
Author:
Recipe type: Soup
Ingredients
  • 1 tbsp. olive oil
  • 1 onion, chopped
  • 2 stalks celery, chopped
  • 2 carrots, chopped
  • 5 cloves garlic, chopped
  • 1 tbsp. fresh basil, chopped
  • 1 tbsp. fresh oregano, chopped
  • 1 tbsp. fresh thyme, chopped
  • 2 tsp. salt
  • 2 tsp. ground pepper
  • 1 - 28 oz. can of roasted tomatoes
  • 5 cups vegetable broth
  • ½ cup half & half
  • additional salt and pepper to taste
Instructions
  1. In a large soup pot, heat up the olive oil on medium-high heat.
  2. Add in the onions, celery, carrots, garlic and herbs.
  3. Cook on medium-high for a few minutes until the onions begin to soften.
  4. Stir in the canned tomatoes.
  5. After a couple minutes of cooking, add in the vegetable broth.
  6. Let the soup come to a boil and then turn down the heat to medium low and cover the pot.
  7. Let the soup simmer covered for about 45 minutes.
  8. Check on the soup. The carrots should have softened.
  9. Puree the soup with an immersion blender.
  10. Stir in the half & half.
  11. Taste the soup and adjust seasoning.
  12. Serve and enjoy!

Creamy-Tomato-Soup
Loaded Grilled Cheese
 
Author:
Recipe type: Sandwich
Serves: 2 sandwiches
Ingredients
  • 1 tbsp. butter
  • ½ tbsp. olive oil
  • 1 onion, sliced thinly
  • 1 tsp. salt
  • 1 tsp. ground pepper
  • 3 cloves garlic, chopped
  • 5 cremini mushrooms, sliced thinly
  • 3-4 slices cooked veggie bacon, optional (or the real bacon!)
  • 4 slices of your favorite hearty bread
  • 2 slices Provolone cheese
  • 2 slices Cheddar cheese
  • 2 slices Swiss Cheese
  • Butter for grilling the sandwiches
Instructions
  1. Heat up the butter and olive oil in a saute pan.
  2. Once the butter has melted, add in the onions. Turn the heat down to medium-low. Cook the onions slowly until caramelized. About 15-20 minutes.
  3. Once the onions begin to caramelize, add in the garlic and sliced mushrooms. Let those cook and soften as well.
  4. Remove from heat once onions are done and set aside.
  5. Cook the veggie bacon or regular bacon in a pan or in the oven or per directions on the package. Set aside.
  6. Make the sandwich. Place a slice of provolone on the bread slice and then layer the onions and mushrooms then cheese then bacon then more cheese and then the other slice of bread.
  7. Butter the outside of the bread.
  8. Grill in a fry pan over medium-high heat until brown on both sides and the cheese is melted.
  9. Serve and enjoy!


White Bean and Kale Soup

white-bean-soup

My daughter came home from a friend’s house and excitedly told me all about the Olive Garden soup she had just eaten for dinner. I don’t think I’ve been to Olive Garden since I was about ten-years-old. I definitely didn’t remember any soup. The friend’s family knows that we don’t eat at Olive Garden and they understand that Gila is a vegetarian. After a moment of panic, I composed myself and asked her to tell me more. She happily told me about this amazing soup filled with spinach, potatoes and delicious broth. For days after, she asked me if I had made my version of the soup yet. I had just finished a marathon soup cooking session. My freezer was already bursting with various soups. I wasn’t ready to make another soup.

As they often do, circumstances change. In the middle of the work day, I quickly texted my husband and asked him what he thought I should prepare for dinner. With a groan, he told me all about his two root canals from earlier that morning and then fast forwarded to the part where he told me that all his jaw could handle was some warm soup. He told me not to worry. He assured me that he would just venture out to a local take-out place and buy something. I couldn’t let that happen. I decided that this was the night to make the soup of Gila’s dreams.

I had some kale in the fridge that needed to be used up.  I decided that it would be perfect in place of the spinach. I also had a ziploc bag of already cooked white beans in the freezer. I set off to make my version of this Olive Garden Soup. Amazingly, I was successful. Gila went to bed with a full and happy belly and Jason happily had three bowls of soup. This hearty soup is a winner and will definitely be made again!


White Bean and Kale Soup
 
Author:
Ingredients
  • 1 tbsp. olive oil
  • 1 onion, chopped
  • 4 carrots, cut up
  • 4 stalks of celery, chopped
  • 5 cloves garlic, chopped
  • 2 tsp. salt
  • 2 tsp. fresh ground pepper
  • 3 small potatoes, peeled and sliced (I used purple, but you can use your preference)
  • 1 bunch of kale, washed and trimmed and chopped
  • 2 cans of white beans, rinsed and drained
  • 1 can of diced tomatoes
  • 2 tsp. basil
  • 2 tsp. oregano
  • 2 tsp. thyme
  • 6 cups of vegetable broth
  • 3 cups water
  • Additional salt and pepper as needed
  • Soup noodles (alphabet or any variety will do) optional
Instructions
  1. Heat up the olive oil in a large soup pot
  2. Add in the onions, carrots, celery and garlic and cook a few minutes to soften.
  3. Stir in the salt and pepper
  4. Add in the kale and the potatoes and the kale and cook a couple of minutes
  5. Add white beans, tomatoes, broth and the water - along with the spices
  6. Bring the soup to a boil
  7. Turn the heat down and let simmer while covered for at least an hour.
  8. If you'd like some noodles in your soup, add them about 15 minutes before serving.
  9. Taste and adjust seasoning.
  10. Serve and enjoy!

white-bean-soup-in-spoon

Vegetarian Freezer-Friendly Meals

freezer friendly meals

I’m preparing to go to Israel for a couple of weeks for a work conference. So in addition to preparing for the big conference, I’m also preparing the house and the family for my being gone for two weeks. I know that the house can run without me, but I panic. I’ve been gone for a week before, but never two! My husband isn’t a bad cook, but he is limited in the kitchen and has limited time for recipes. I decided that I needed to come up with a food plan ahead of time. I began planning a month in advance. I set aside my Sundays for cooking and freezing a few dishes to ensure that my kids would not be feasting on ramen and Wacky Mac each night. Mind you, they’d be thrilled with those options. I just want some more nutritious options in their bellies. I also wanted to make it easy on my babysitter. A simple reheat makes things uncomplicated. Everything is properly wrapped and labeled. All that needs to be done is a quick chopped salad and dinner is done!

Here are some of the dishes I already have ready to go:

French Onion Soup | Carrot Ginger Soup | Moroccan Lentil Soup | White Bean and Kale Soup | Split Pea Soup | Vegetarian Chili | Vegetable and Black Bean Burritos | Mushroom and Onion Quiche | Baked Mushroom Macaroni and Cheese | Eggplant Pasta Bake | Homemade Pizza Bagels | Veggie Burgers | Veggie Meatballs and Sauce | Quesadilla Pie | Quinoa and Chickpea Loaf | Lentil Sloppy Joes

*Please let me know if you’d like me to post he recipes to any of the above dishes that aren’t already linked
and I will try to make them a future feature.

P.S. If you have any great foodie suggestions in Israel, let me know in the comments below!

While trying to come up with my own menu plan, I sought out some help from many of my foodie friends. Sharing some fantastic ideas with you here! Do you have a favorite freezer-friendly dish? Share them in the comments below.

Soups:

Roasted Winter Vegetable Chowder – Kitchen Treaty

Crockpot Pumpkin Red Lentil Chili – Kitchen Treaty

Slow-Cooked Split Pea Soup – This American Bite

Carrot Soup with Coconut Milk – JewHungry

Roasted Red Pepper Soup – Tales of an Overtime Cook

Main Dishes:

Baked Falafel  – May I Have That Recipe

Pretzel and Cashew Crusted Tofu – May I Have That Recipe

Crepe Lasagna – Because I Like Chocolate

Green Mac & Cheese – The Kosher Foodies

Whole Wheat Cabbage & Mushroom Galette – The Kosher Foodies

Peas and Shells with Vegan Alfredo – JewHungry

Eggplant Casserole – EverydayMaven

Asparagus, Dill & Onion Egg Casserole – EverydayMaven

Sides:

Broccoli Kugel Muffins – Tales of an Overtime Cook

Tofu, Cauliflower & Greens with Soba Noodles and Miso Tahini Sauce

Soba Noodles in Miso Tahini Sauce

I’ve had a jar of tahini sitting in my pantry for too long. I really should use it more often. My intention when I bought it was to use it in salad dressings and similar sauces, but I just haven’t reached for it until now. I actually never intended to use it in this dish, but it just happened, and I’m glad it did.

I got a couple of bunches of broccoli rabe greens in my CSA and I wanted to include it in dinner. I also had a head of cauliflower begging to be used. Both of these veggies tend to get used as side dishes. I wanted to include both in my main course. So I came up with this soba noodle dish. I love cooking with soba noodles. I buy a gluten free version and they cook up so fast and taste excellent.


Tofu, Cauliflower & Greens with Soba Noodles and Miso Tahini Sauce
 
Author:
Recipe type: vegan, dinner, gluten free
Ingredients
  • Soba Noodles
  • 1 pound of extra-firm tofu, cubed and drained
  • 1 tbsp. tamari or soy sauce
  • 1 tbsp. coconut oil
  • 2 tsp. sesame oil
  • 1 small onion, chopped
  • 1 shallot, chopped
  • 5 cloves garlic, chopped
  • 1.5 tbsp. ginger, chopped
  • 1 head of cauliflower, washed and trimmed
  • 1 bunch of broccoli rabe greens (could also use spinach or swiss chard), washed and chopped
  • 2 tsp. red pepper flakes
  • 1 tsp. salt
  • 1 tsp. ground black pepper
Miso Tahini Sauce
  • 3 tbsp. tahini
  • 2 tbsp. white miso
  • 1 tbsp. soy sauce
  • 1 tbsp. ginger, chopped
  • 2 cloves garlic, chopped
  • ¾ cup water
  • 1 tsp. ground black pepper
  • 1 tsp. red pepper flakes
  • additional salt and pepper to taste
Instructions
  1. Boil some salted water in a pot and cook the soba according to the directions on the package. Drain and rinse with cold water to stop the cooking process.
  2. Preheat the oven to 400.
  3. Mix the tamari and the sesame oil. Mix in to the cubed tofu. Place the tofu on a baking sheet and bake in the preheated oven for about 20 minutes.
  4. Heat up the coconut oil in a large pan. Add in the sesame oil.
  5. Saute the onion, garlic, ginger and shallots for a few minutes to soften.
  6. Break up the cauliflower and add to the pan. Cook for about 8-10 minutes. Let the cauliflower brown a bit.
  7. One the cauliflower is softer, but still has some bite to it, turn the heat down lower add in the chopped greens.
  8. Add in the red pepper flakes, salt and ground pepper.
  9. In a separate bowl, whisk all of the sauce ingredients together.
  10. To serve, layer the soba noodles then the cauliflower mixture. Then pour the sauce over both. You can garnish with scallions, roasted sesame seeds and additional red pepper flakes if you like.
  11. Enjoy!

Soba Noodles in Miso Tahini Sauce

Asparagus and Leek Fried Rice

We recently spent the day in and around Bucks County, PA. This area that stretches from the New Jersey border, near the Delaware River, is simply beautiful. Filled with beautiful farmland, old homes, and adorable little shops and wineries – there is just so much to see. As we were driving to our destination, we passed by a farm that advertised some fresh asparagus. I love asparagus! I got super excited, but we had somewhere to be. I made note of the sign and hoped that we’d be able to buy some of the good green stuff on our way home.

We stopped by the farm on our way back. At first I was disappointed to see that the place appeared “closed.” On closer look though, I noticed a small little shack with open doors that appeared to have farm goods inside. I got out of the car to inspect. They had a small selection of asparagus, herbs, greens and fresh honey available. There was no shopkeeper, but all items were priced and there was a locked box to deposit your money in. Love it! I fished out a few dollars and bought some asparagus! Love this kind of shopping. Further down the road, we stopped at another farm for fresh brown eggs. It was a lovely day!

8745779575_94e4012e4b_z

I was so excited to use this fresh and local asparagus. Earlier that morning, I had picked up some lovely fresh leeks. I love the way leek pairs well with asparagus. I was thinking about just sauteing the two as a side dish, but then it occurred to me to use the vegetables in my main dish.


Asparagus and Leek Fried Rice
 
Asparagus and Leek Fried Rice
Author:
Ingredients
  • 1 tbsp. rice bran oil or canola oil (or any other high heat friendly oil)
  • 1 tsp. sesame oil
  • 4 cloves garlic, chopped
  • 1 small onion, chopped
  • 2 tbsp. crushed fresh ginger
  • 8 oz. chicken-style seitan (or protein of your choice)
  • 2 leeks
  • 1 lb. asparagus, cut to 1.5 inch pieces
  • 4 cups cooked and cooled rice
  • 1 tsp. salt
  • 2 tbsp. tamari or soy sauce
  • 1 tsp. sesame oil
  • 2 tsp. red pepper flakes
Instructions
  1. Start by cleaning your leeks. Slice them in thin rounds and soak in cold water. The sand and grit will soak to the bottom. Blot dry with a paper towel.
  2. In a large wok or fry pan, heat up the oil.
  3. Add in the garlic, ginger and onion. Cook for about 5 minutes to soften a bit.
  4. Add in the seitan chicken or any protein for that matter. Cook for two more minutes.
  5. Add in the cleaned and trimmed leeks and asparagus. Cook for about 3-5 minutes.
  6. Stir in the already cook rice. Mix to incorporate well.
  7. Add in the rest of the seasonings. Cook for another 5-10 minutes, stirring as you go. Taste and add additional seasoning as necessary. I love adding some chili pepper flakes and a squirt of sriracha when I eat it,
  8. This dish is very versatile. Feel free to add other vegetables or change up your protein.


Product Review: Saffron Road Simmer Sauces

I’m so happy that Passover is over. I had a wonderful holiday, but the long week of holidays left me exhausted. I didn’t really want to look at food. While some people turn to pizza or pasta for their first bite of leavened breads, my first must-have is always some warm Basmati rice. I rarely crave bread or pasta. Rice is something I could eat any day.

tikka-masala-3
When I came upon the Saffron Road simmer sauces at Whole Foods, I was very excited to see that they were kosher certified. I love these kinds of flavorful sauces and usually have to make them from scratch. The fact there there were these packets of sauces and they happened to be kosher, opened a world of dinner possibilities for me. These sauce packets are flavorful and perfect for a busy weeknight.
Saffron Road recently sent me a package with all four varieties of the Simmer Sauces to try. That was a happy mail day! I had to try one of the flavors right away!
lemongrass-basil2I decided to go with the Lemongrass Basil option first. I love Thai curries. Because these sauces are dairy or certified as made on dairy equipment, these could only be prepared with vegetarian proteins in my kosher home. If you don’t keep kosher though, the options are endless. The Lemongrass Basil would be perfect with seafood or chicken. I prepared this dish with tofu and vegetables. The directions were easy to follow and dinner was perfect. It was ready to go in less than 10 minutes! How awesome is that! The Lemongrass Basil sauce is so flavorful and seeped in to the veggies and tofu very well.
For another dinner I prepared the Moroccan Tagine sauce. I added the sauce to a mixture of vegetables and chickpeas and then served over couscous. Again, I was surprised by the level of flavor in this dish! I didn’t expect a shelf stable sauce to pack that much flavor.

saffronroad2

Last, I tried the Tikka Masala sauce packet. I sauteed some veggies and tofu with onion and garlic. When the veggies were ready, I poured in the sauce. I had rice ready to go. Dinner took around 10 minutes to prepare. The veggies and tofu were great. The Tikka Masala has a nice heat level to it, with a bit of underlying sweetness.

All in all, these sauce packets are perfect for a busy night. If they had been certified as kosher pareve, I would have added them to some chicken, and would have expected similarly tasty results.  These Saffron Road sauces are all natural and packed with flavor. I will definitely pick them up again. I am looking forward to seeing what else they have to offer.

Meatless Monday: Vegetable and Rice Patties

My older daughter just left for camp. It’s so odd having one less child in the house. When I got home and started to prepare dinner this evening, there was nobody to complain. Nobody questioned the flavors that would show up on the plate. I kind of miss it! It is nice though to be left with just my kid who eats anything. It’s a nice treat to see everything eaten on the plate – even the onions.

I still miss the kid. A lot. And it’s only been a day.

We were gone over the weekend, and I have a limited selection of what is available in the fridge. As with any Monday, dinner must be fast. With a limited supply of veggies and some cooked rice in the fridge, these veggie rice patties were perfect for a light dinner. When paired with a salad, everyone is happy.

Vegetable and Rice Patties 
Ingredients:

2 cups cooked rice, cooled (white or brown works)
1 small onion, chopped
5 cloves garlic, crushed and chopped
1/4 cup sun dried tomatoes, chopped
1 small green pepper, chopped
3/4 cup mushrooms, chopped
1 small zuchinni, chopped
1 small yellow squash, chopped
1 cup shredded cheese (I used a cheddar jack blend)
3/4 cup panko crumbs or gluten free alternative
2.5 tsp. salt
2 tsp. pepper
2 tsp. red pepper flakes
1 tsp. thyme
1 tsp. oregano
1 tsp. paprika
1 tsp. rosemary
2 tsp. garlic powder
4 eggs
2-3 tbsp. vegetable oil for pan frying

Directions:

Mix everything together in a large mixing bowl. Shape in to patties and let sit on a plate for about 10 minutes to set.

Pan fry in a small amount of oil for a few minutes on each side – until browned.

Drain on paper towels.

Enjoy!

Vegetable Rice PattiesN
This post is linked to My Meatless Mondays

Meatless Monday: Cumin and Cardamom Spiced Cauliflower Soup with Homemade Croutons

My daughter’s recent vegetarianism has been a welcome treat for me. Aside from the whole 2 to 1 mentality of the vegetarian to meat-eater split, food prep has been easier in other ways. My picky 10-yr-old is suddenly willing to try more foods. After explaining to her that being a vegetarian didn’t meat that she could eat endless bowls of mac & cheese, she finally began to understand. We discussed the virtues of eating healthy proteins and good veggies with our meals; she has really dived in to a better, rounded diet.

Just a few short weeks in to what my husband hopes is a passing phase, my daughter is willing to eat an increased variety of vegetables as well as beans and fake meats for her protein. This is a kid who in the past would have the same yogurt every single day for lunch. This is a success. 
I asked her to help with our meal planning. She suggested soup for dinner. Soup. Soup, really??! On such a hot day? My husband thought it would be a good idea. I am always impressed by people who can eat and cook hot things throughout the summer. Regardless, I made them happy. I set out to make some soup for dinner as well as some croutons to go along with. 

Cumin and Cardamom Spiced Cauliflower Soup
Ingredients:

7-10 cardamom pods – crack them a little
1 tbsp. cumin seeds
1 tbsp. olive oil
1 onion, chopped
6 cloves garlic
1 tbsp. ginger, chopped
3 tsp. cumin powder
1 head cauliflower, broken up
2 carrots, chopped
2 stalks celery, chopped
6 cups vegetable broth
salt
pepper
1 tsp. cayenne pepper
Directions:
Heat up your soup pot
Add the cardamom pods and the cumin seeds to the pot. Toast them for a minute or two. They will start to get fragrant.
Add the oil to the pot.
Add in the onion, garlic and ginger. Cook for 3 minutes to let them soften. 
Add in the cumin and the chopped cauliflower. Stir up and let the cauliflower toast a bit in the oil. 
Add in the carrots and celery and cook for a few minutes.
Cover with the vegetable broth. Bring the broth to a boil. Turn the heat down to medium and cover with a lid. 
Cook for about an hour.
After an hour, the mixture should be soft. Puree the soup with an immersion blender.
Serve and enjoy!

Cardamom and Cumin Spiced Cauliflower Soup
Homemade Croutons
Ingredients:
2-3 cups of cubed crusty bread (I used some focaccia)
olive oil
salt (to taste)
Directions:
Preheat oven to 400.
Lay out the cubed bread on a baking sheet.
Toss with olive oil and some sea salt.
Toast in oven for about 7-8 minutes. 
croutons 002


Cool and store in airtight container.

Chinese Eggplant in Garlic Sauce

I am the only eggplant eater in this house. No matter how much I try to experiment and offer different varieties – nobody seems to budge. They don’t like the texture or the taste. Still trying and I still love eggplant. Whenever I do want to make eggplant dishes, I prepare in small quantities or freeze in portions.

I picked up some Chinese eggplant recently. I have been craving some eggplant in garlic sauce. Haven’t had it in years. The other night, the kids had eaten and the hubster was out for the night. I finally had my chance. The house was quiet. Ahhh, peace. I should have probably taken a nap or something. Instead, I made a late dinner. It’s worth it though. I also made enough for lunch the next day. 

IMG_1438

Chinese Eggplant in Garlic Sauce
Ingredients:


3 Chinese Eggplants
Cubed, pressed tofu (I only added it because it was leftover – totally unnecessary)
4 garlic cloves, chopped
2 tbsp. chopped ginger
1 tbsp. vegetable oil
1/4 cup water
4 tbsp. soy sauce
1 tbsp. rice vinegar
1/2 tbsp. sesame oil
1 tbsp. chili garlic sauce
1 tbsp. brown sugar
1 tsp. cornstarch
1/4 cup vegetable broth
chopped scallions
red pepper flakes

Cube up the eggplant.

In a large pan, Saute the eggplant in the vegetable oil. Add in the garlic and ginger. Cook for around 5 minutes.

IMG_1439

Add in the water and cover the pan. Steam the eggplant for around 10 minutes.

Mix up the rest of the ingredients (except red pepper flakes and scallions).  Pour and mix in to eggplant mixture.

Add in the scallions and red pepper flakes.

Garnish with scallions and serve with rice. Enjoy!

IMG_1441

Meatless Monday: Vegetarian Tamales

Every morning, as I walk to the subway, I walk by this little old woman selling fresh tamales from a big pot on a cart. It’s a very small set-up, most likely illegal. She is there every morning though, rain or shine. I am sure they taste amazing, and I always wish I could sample her goods.

I have been toying with making my own tamales for a while. I bought some dried corn husks a while back. Had been debating the filling for while. Finally came up with a plan. Very happy with the results and I will definitely make again. Tamales can be frozen and reheated in the microwave or steamer.

Vegetarian Tamales
Ingredients

Dried Corn Husks

Filling:
1 tbsp. oil
1 large onion, diced
4 cloves garlic, chopped
1 large zucchini, diced
1 can black beans
1/2 small can chipotle peppers in adobe sauce, chopped
1/2 package of mushrooms, chopped
2 tsp. chili powder
2 tsp. cumin
2 tsp. salt
chopped cilantro
1/2 cup broth
1 cup shredded cheese

Masa Tamale Dough:
2 cups masa harina
2 cups vegetable broth
2 tsp. cumin
1 tsp. chili powder
1 tsp. salt
2 tsp. baking powder
1 stick of Earth Balance shortening

Start by checking the corn husks. Check for bugs. My package didn’t have any, but these still should be checked. There was corn debris. Just what looks like dried strands of the corn silk. Brush off any shmutz on the corn husks. Soak them in a large bowl of warm water for at least 30 minutes.

IMG_1267

While the husks are soaking, you can prepare the rest of the components.

In  a large pan, saute the onion and the garlic in the oil. Add in the spices.

Mix in the zucchini and the mushrooms. Saute for around 5 minutes, or until soft. Stir in the chipotle pepper and the black beans.  Add the vegetable broth if the filling starts to look too dry. Turn off the heat and mix in the cheese. Set aside.

IMG_1266

Now it’s time to prepare the the masa dough. Measure out the masa, the spices and the baking powder in to the bowl of a mixer. With the mixer going on low, pour in the vegetable broth.  Mix to form in to crumbly paste.  Add in the shortening. Mix for a minute or so. Everything should be incorporated. Make sure to scrape down the sides of the bowl with a spatula.

IMG_1268

Now it’s time to assemble.

Set yourself up with everything nearby.

Set up your steamer station. I didn’t have a steamer that fit my dairy stock pot for this, so I used a metal colander. Place water at the bottom of the pot and bring to a boil. Turn it to medium.

Make strips out of a few of your corn husks. These will be your tamale ties.

IMG_1269

Lay out a corn husk and spread some masa dough down the center.

Place about a tablespoon or two of your filling in the center of your dough.

IMG_1270

Roll up the corn husk like a burrito: Fold the bottom side up, and the sides in. Then tie it up.

IMG_1279

Place upright in your steamer set-up.

IMG_1280

Steam on medium/medium-high for around 90 minutes. Check your water levels throughout.

When done, the masa dough will be firm.

Remove tamales from steamer.  They will be extremely hot. Be careful when opening.

IMG_1283

Serve with some salsa and sour cream. Or eat it just straight out of the package. These are great as a meal or a snack even! Enjoy!

1 2